How to Install Ground Posts for a Hoop House

How do you anchor a hoop house?
Properly installed ground posts are literally the foundation of any hoop house build. The importance of having the right tools for the job and knowing what mistakes to avoid cannot be overstated. After designing and building quite a few of these over the years here at Bootstrap Farmer, we have some tips for squaring up a hoop house structure properly.
Making sure that your first four corner posts are squared will provide you with a base to work from to ensure the rest of the posts are easy to install plumb and level. We advise you to square and sink those corner posts before everyone has arrived to help you with the hoop house build. Because the process can be time consuming and occasionally frustrating it is nice to not have a crew watching you while you try to get it right. Using the correct tools to sink your posts will make the rest of the build go much smoother. We suggest having the following tools on hand when you start the process.
- Ground post driver
- Sledge hammer/double jack
- Single jack (a smaller sledge hammer with a handle under two feet in length)
- Tape measures; ideally at least one that will measure the entire length of the diagonal between corner posts.
- Levels; a line level and a magnetic level.
- Mason line
- Stakes
- Pencil, paper, and a calculator
Using a Ground Post Driver
Every kit we sell comes with a specialized tool called a ground post driver. It is placed in the top of the post to keep it from mushrooming when you hit it with a sledge hammer. Because the hoops will be slid into the ground posts it is vital that they stay perfectly round. We find it easier to start this process using a single jack as opposed to a larger double jack/sledge hammer.
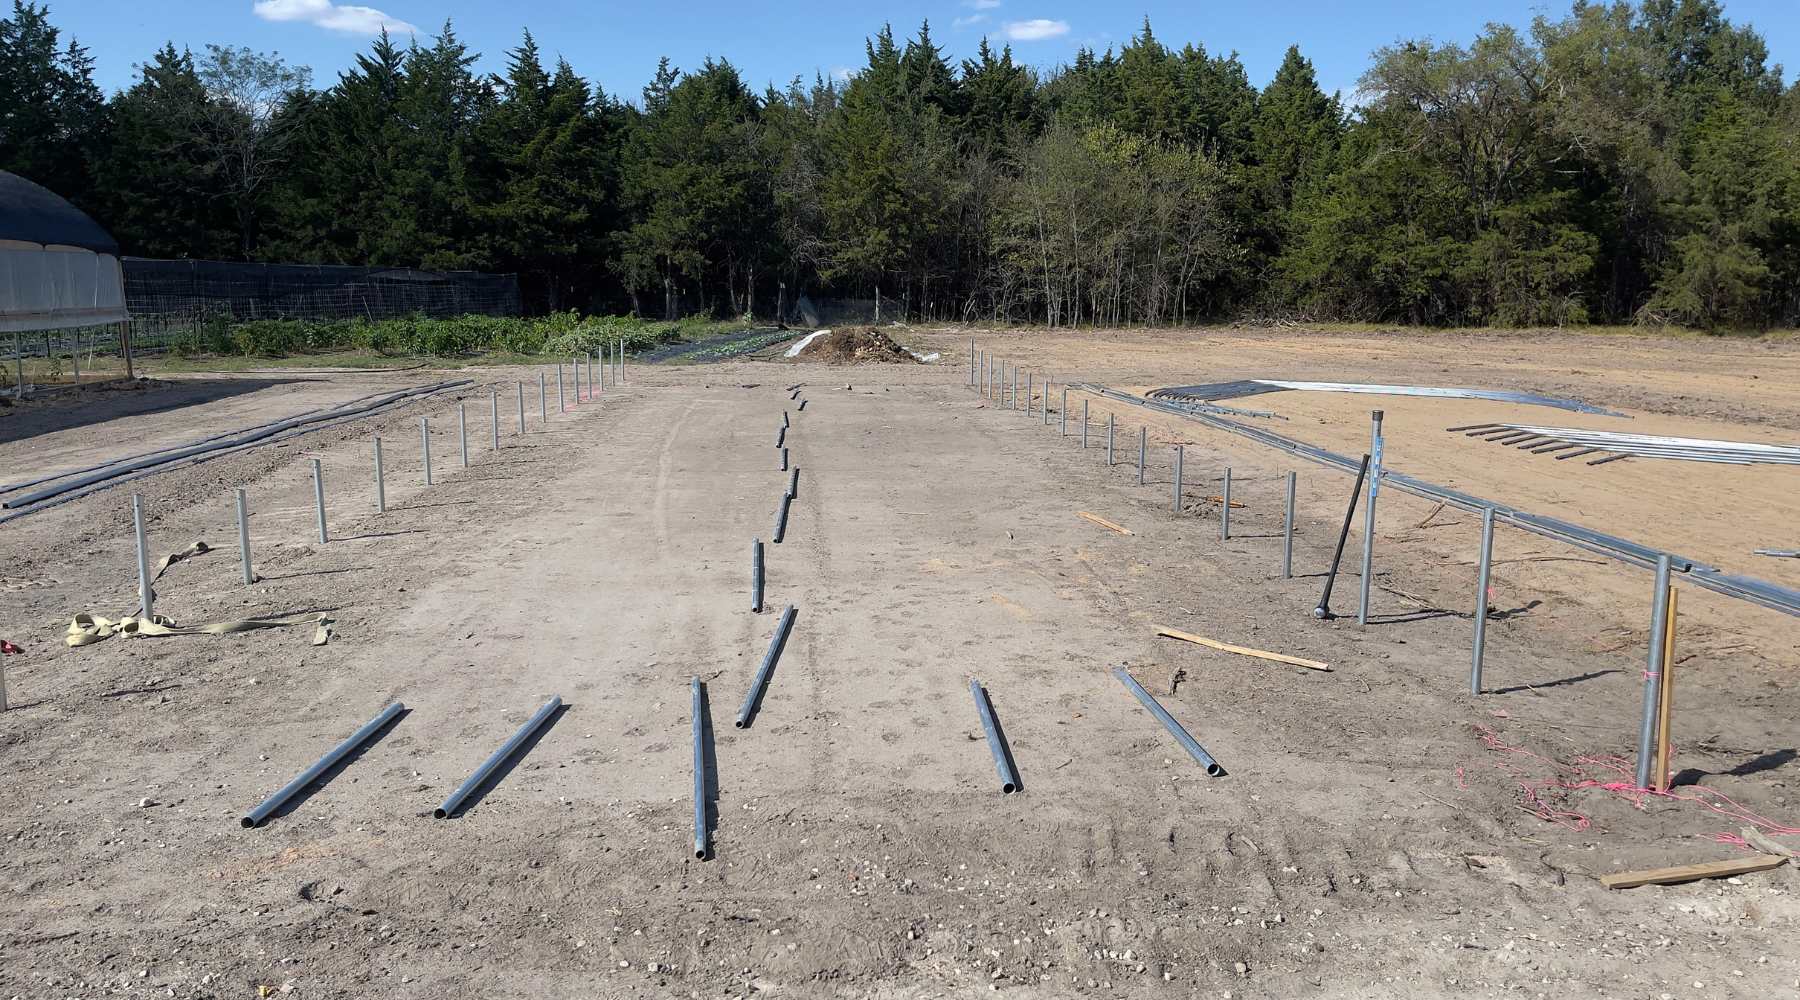
Installing Ground Posts
Using a magnetic level will help tremendously to keep your posts perpendicular to the ground as you drive them in. Place the ground post driver into the top of your ground post and drive it in using your small sledge hammer. Every few pounds, stop and check for level on two sides. The farther in you drive the post the less it will try and wiggle out of level.
Driving the ground posts is the most physically demanding task in a hoop house build and there are a lot of them. This task can be spread out over a couple days or over a few people. As long as each person understands the importance of keeping the posts plumb and perpendicular to the ground. Make sure you also put in a mason line two feet off the ground so everyone knows how deep to drive the posts for the hoop house. Need a visual? Watch this video to view the process step by step.

Squaring a Hoop House
There are a few main strategies people use to square up all the sides of a hoop house. The pythagorean theorem is the easiest for many people as we have some vague memories of having to do this in high school. The other methods involve walking back and forth quite a bit.
For some people it is easier to watch this done instead of reading about it. If this is you please check out our video on How to Square a Hoop House over on YouTube.
If the method we explain here does not make sense to you, searching for “how to square a shed” or “how to square a greenhouse or high tunnel” online will provide you with videos of people doing this in a variety of ways.
Using the Pythagorean Theorem to Square a Hoop House
The old A²+B²=C² comes in very handy when you start building a foundation that needs to be squared. It allows you to take the known side lengths of your building and find the exact measurement for the diagonals. For example; if you are building a 100’ by 20’ hoop house, 100²+20²=10,400. This means if we take the square root of our C²(10,400’) we get 101.98 or about 102’.
You can then take those measurements and place your ground posts precisely where they need to be by measuring and marking where the sides and diagonals should intersect. Stakes and mason line come in very handy in this step. You are making a triangle with a right angle where the 100’ and 20’ measurements intersect.
Starting by sinking a post at one corner. Extend your mason line in two directions beyond where your walls will go perpendicular to each other and stake in place. Mark the line at 100’ on one side and 20’ on the other. Sink your second post at the 100’ mark. Using a third length of mason line, attach it to the second post, measure and mark this piece at 102’ for the diagonal. Walk it over to your 20’ marked piece of line. The point where the marks line up is where you will sink your third post.
Keep in mind that mason line can stretch slightly so it will be important to double check all of your measurements once the lines are in place. We suggest driving the posts in only a few inches until you have double checked all of your measurements. Once you are sure everything is square, drive the posts in to the proper height. You will now be able to use the first four posts to keep the other posts plumb as you drive them.
You can be up to 4 inches off in this process and not affect the overall build. So if those last few inches are giving you fits after walking back and forth a few dozen times, feel free to call it good enough.
Watch the Video:
Checking for Plumb When Placing Your Ground Posts
Use the first four corner posts you drove to attach a mason line all the way around the outside footprint of your structure. If it makes it easier for you and your helpers, you can put a line that runs on the inside of each post as well. Use these lines to keep each row of posts in line with one another. These lines will also help you when building your end walls for the hoop house.
Drilling the Ground Posts for Drainage
Once you have all of your ground posts driven to the correct depth, you will need to go around and drill a drainage hole in each one a few inches above the soil line. As water condenses on the plastic and runs down inside the hoop house it can fill up the ground posts. If this water then freezes, it can damage the posts. Even if you don’t have hard freezes where you are, it is best to drill these holes as leaving water in the posts will increase the chances of rust developing.
Using concrete to secure ground posts
It is possible to secure your ground posts with the help of cement. This technique takes a bit more prep work. First, dig the ground post hole with a diameter about three times the width of the ground post. Add about 4-6 inches of gravel to the bottom of the hole and compact it. Set the post using a level to check for plumb. Fill the hole with fast-setting concrete up to 3-4 inches below ground level and add water per directions. Let the concrete set for 24 hours before setting hoops.
Using compacted gravel to secure ground posts
Backfilling the ground post hole with gravel is a great way to add more strength. Start with a hole about the size of the one you'd dig if you were using cement to fill the space around the ground post, insert a third of the post's length into the hole, and then fill with crushed gravel, tamping every four-five inches until flush with the ground.
Getting Your High Tunnel Right From the Ground Up
Your ground posts are the foundation of your build. Making them square, plumb and level will give you the best base to work from. Getting the squaring done ahead of your first big build day will ensure you are not sitting around trying to do math with everyone watching and waiting.
Check out Ground Posts and Hoops to learn how ground posts and hoops work together to form the hoop houses.
Having the right tools around to do this job is invaluable. Having a few extra won’t hurt either. It always amazes us how we can bring seven tape measures to a job and there will inevitably come a point where we can’t find a single one.
Take your time to get these steps right and you will have set yourself up for a successful build. Need more help? Check out our building guides.
