Mushroom Growing Activity for Kids
Mushrooms are decomposers and recyclers
This mushroom growing project is great for all ages. We have tried to include a wide range of grade level appropriateness. You know your students best, so feel free to pick and choose what will work best for them.
This experiment can be as topical or in depth as you like. You can even build an entire study unit around this simple experiment by making use of the cross curriculum standards. For ideas on building a unit of study check out the extension activities suggested below.
Throughout grade levels, the science standards address the same concepts but get more complex in both levels of understanding and requirements for showing that understanding. The experiment outlined here can be adjusted depending on your students’ grade level. The underlying science concept is listed below and we have included a few of the most relevant grade level standards at the end of this resource to help guide you to further research.
This lesson is designed in two parts. Part one involves using a purchased fruiting block and can be completed in around 7-10 days. Part two involves growing your own mycelium and can take anywhere from 4-8 weeks to complete. If you will be purchasing bulk spawn instead of fruiting blocks be sure to follow the proportions suggested by the spawn company.

NGSS Science Standards
|
5-LS2-1. |
Develop a model to describe the movement of matter among plants, animals, decomposers, and the environment. [Clarification Statement: Emphasis is on the idea that matter that is not food (air, water, decomposed materials in soil) is changed by plants into matter that is food. Examples of systems could include organisms, ecosystems, and the Earth.] |
LS2.A: Interdependent Relationships in Ecosystems: “The food of almost any kind of animal can be traced back to plants. Organisms are related in food webs in which some animals eat plants for food and other animals eat the animals that eat plants. Some organisms, such as fungi and bacteria, break down dead organisms (both plants or plant parts and animals) and therefore operate as “decomposers.” Decomposition eventually restores (recycles) some materials back to the soil. Organisms can survive only in environments in which their particular needs are met. A healthy ecosystem is one in which multiple species of different types are each able to meet their needs in a relatively stable web of life. Newly introduced species can damage the balance of an ecosystem.
LS2.B: Cycles of Matter and Energy Transfer in Ecosystems Matter cycles between the air and soil and among plants, animals, and microbes as these organisms live and die. Organisms obtain gases, and water, from the environment, and release waste matter (gas, liquid, or solid) back into the environment.”
Developing and Using Models
Modeling in 9–12 builds on K–8 experiences and progresses to using, synthesizing, and developing models to predict and show relationships among variables between systems and their components in the natural and designed worlds.
- Use a model based on evidence to illustrate the relationships between systems or between components of a system.

Background Knowledge
This part is mostly for the big kids and the grown-ups. Review for yourself and your students the basics of fungi and how they grow. This is a great time to use a K-W-L-W four-column chart. Have your students write or draw what they KNOW about mushrooms and what they WONDER about how mushrooms grow. You can circle back at the end of the experiment to fill out what they have LEARNED and what they WANT TO KNOW next.

Review of Fungi
Fungi are a whole kingdom unto themselves. These decomposers are a vital part of just about every ecosystem. Neither plant nor animal but having many traits common to both, fungi are one of the least known and most fascinating forms of life on our planet. They are also one of the oldest. Fossilized fungus, giant towering mushrooms have been found dating back to 400 million years ago.
In order to help your students learn using fungi, it is important that you have a basic understanding of the vocabulary and life cycle of a mushroom. If this is your first experience with growing and learning about mushrooms, don’t worry we have included a basic review below. Also, there is so much value in your students watching you learn and discover right along with them.
To start understanding fungi, let’s begin with what they need to survive. Fungi need many of the same things that all other lifeforms on earth need to survive. They just get them in different ways.

The Basic Needs of Fungi
- Nutrients - from the substrate they digest be it wood chips or coffee grounds
- Water - from the moist substrate and the humidity in the environment
- Fresh Air - mushrooms breath in oxygen and exhale carbon dioxide just like us
- Light - mushrooms do best with some light that mimics the dappled sunlight they would get from living on the forest floor. Indirect sunlight, like a shady spot outside or inside on your counter.
- A Temperate Environment - most fungi like to produce mushrooms between 55-70℉. A little higher or lower is okay for oyster mushrooms.
Important Vocabulary
Feel free to choose the words that are appropriate for your students' grade level. These make great flashcards and/or quiz questions to check for understanding.
Science terms
Observation - a statement based on something seen, heard, or noticed.
Control - a group used as a standard of comparison for checking the results of an experiment.
Variable - a thing that is changed. Good science experiments have three kinds of variables.
Independent variable - a cause, the difference or change decided by the scientist. Ideal experiments have only one independent variable. The independent variable is decided by your essential question or hypothesis. (In this experiment, growing media is the independent variable.)
Dependent variable - an effect, the change caused by the independent variable. Must be observable and measurable.
Controlled variable - all other factors of an experiment that must be kept the same. (In this experiment, light exposure and temperature are controlled variables.)
Prediction - a statement of what we think will happen.
Hypothesis - a testable prediction about the relationship between two variables.
Carbon dioxide - a gas in our atmosphere made up of one carbon atom and two oxygen atoms.
Water - an important part of our environment made up of two hydrogen atoms and one oxygen atom.
Fungi terms
Mycelium - the underground portion of fungi, relatable to the roots of a plant.
Substrate - the food and habitat of the mycelium. Typically, the mushrooms we eat are grown in substrates of wood, straw, coffee grounds, or other agricultural waste like coco coir, wheat bran or cottonseed meal.
Substrate Block - a bag filled with myceliated substrate. Once exposed to air, it will fruit.
Spore - a fungi’s unit of reproduction, capable of matching with another spore to start another colony of mycelium. Spores are nearly microscopic in size.
Sporulate - when a mushroom completes its growth and produces spores. Mushrooms should be harvested before this point or moved outside so the spores are not distributed indoors.
Fruiting Body - mushrooms.
Fruiting Chamber - a small enclosure or room that maintains high humidity, appropriate temperature, and air exchange for mushrooms to grow (fruit).
Inoculation - introducing mycelium to a fresh substrate to myceliate it.
Spawn Run - mycelium growing through the substrate
Pins or Primordia - baby mushrooms
Carbohydrate - a large group of organic compounds that includes sugars, starch, and cellulose, containing hydrogen and oxygen in the same ratio as water used as structural materials and for energy storage within living tissues.
Cellulose - one of the fungi’s most important foods, an insoluble complex carbohydrate (polysaccharide) used by plants in cell wall construction and plant fibers.
Lignin - a complex organic polymer deposited in the cell walls of many plants, making them rigid and woody.
Soluble - can be dissolved, especially in water.
Insoluble - cannot be dissolved.

Essential Questions or Hypothesis
Using essential questions to guide your daily observations will help your students focus their learning.
Example hypothesis:
- Part one: My hypothesis is that the block will grow ten mushrooms. How many mushrooms will grow on the block?
- Part two: My hypothesis is that the coffee grounds will produce more mushrooms than the cardboard. Which substrate produces more mushrooms?

Supplies
You will need a few basic supplies to undertake this experiment. In most cases, they can be cobbled together from things you have already lying around the house. Or you can purchase a kit to use with your experiment.
For part one:
- Watertight growing tray
- Humidity domes or another covering to maintain proper humidity
- Optional, hydrogen peroxide for sterilizing equipment
- Pencil and paper or observation notebook
- Spray bottle for misting to maintain humidity
- Counter space with indirect light, not near a window that would result in direct sun on the block.
For part two:
- Additional tray or trays with humidity and blackout domes for each (depending on how many substrates you will use.)
OR
- Glass jars with lid rings and coffee filters.
AND
- Sterilized substrate for growing mycelium; can be any of the following. (More on this process in the instructions below.)
- Coffee grounds
- Straw
- Cardboard
- Sawdust
- Wood chips
- Wheat Bran
- Coco Coir
Time per day for experiment part one
You can spend as much or as little time as you like on the educational portion of the experiment. These estimates are for the actual work involved in growing the mushrooms and taking down observations.
- Day 1: 20 minutes active
- Day 2-7: 10 minutes or less
- Day 8-10: 10 minutes
- Final day: 20 minutes or more, depending on grade level.

Daily Observations
Making detailed observations, comparing and contrasting, and making predictions are all important parts of the scientific process. Including this in your experiment helps tremendously to stimulate scientific thinking.
For your students, choose a grade level appropriate way for this to be done:
It can be drawing pictures of what has changed for little ones and dictating a sentence about what they see, smell, or feel.
Older students can use a ruler to measure growth each day and make observations with their senses: How does it smell, What does it look like, How does it feel, etc.
Middle and high school students can do all of the above and compare what has changed since their last observation, make predictions about what will be different tomorrow, and describe how their previous predictions were correct or erroneous.

Procedure Part One
For each day, have your students draw and label the experiment as well as make observations about what has changed. Making predictions about what will happen next is a useful step to include in this portion as well. Introduce the vocabulary words as appropriate to facilitate labeling.
This is a two-part experiment. The first part will rely on using a purchased fruiting block from a reputable mushroom supply company. We have linked a few good choices in the resource section at the end of this lesson, such as which to purchase oyster mushroom blocks. We suggest starting with oyster mushrooms because they are easy to grow and mild in flavor. They will also grow on a wide variety of substrates.
Once you have completed the growing and harvesting of the first flush of mushrooms, you will be able to move on to the second part. In this section, you will grow your own mycelium on one or more substrates of your choice. This is where you have the opportunity to involve any number of extension activities outlined at the end of this lesson.
Day 1:
Prep: It is best to have your supplies and lesson prep ready once you order your block. Most fruiting blocks will need to be set up as soon as they arrive, although they can be stored in the fridge for up to a week if needed.
It is recommended that you start the experiment on a Friday since the first two days will be the slowest growth days.
Collect all your supplies. Wash all trays with hot, soapy water and dry. Because mushrooms are susceptible to bacteria, viruses, and mold issues, it is important that surfaces and hands are clean when working with the blocks.
Step 1: With clean hands, have students observe and feel the block through its bag.
Step 2:
- If you will not be using the kit, follow the instructions that came with your mushroom block to cut holes and place them in your prepared growing space.
- If using a kit, cut the bag open and remove the mushroom block. Place it in the mesh tray set inside the tray without holes. Using your spray bottle, mist the inside of the humidity dome and place it over the block. Open the vents on top to allow for airflow.

Step 3: Have students record their observations and their hypothesis or essential question.
Days 2-7:
- Always wash hands before and after handling mushroom growing equipment.
- Lift the lid on each tray and make your daily observations.
- Mist the inside of the humidity dome 1-3 times per day. Do not spray water directly on the substrate block or mushrooms. The ambient humidity and growth stage of the mushrooms will affect how frequently you need to mist them. Rooms with air conditioning will be less humid and require more frequent misting.
- Once the mushroom pins begin to form, you can begin taking measurements. They grow quickly, so this can be done more than once a day if you like.
It may take longer for your mushrooms to mature. If so, continue with observations until the mushrooms are ready for harvest.

Day 8:
Depending on your growing conditions, your mushrooms will be ready for harvesting, and the next steps between 8-10 days. Oyster mushrooms are ready for harvest once the outside edge is curled under and feels similar to the curve at the top of your ear. Heat, humidity, and light will all play a part in the speed of growth.
Step 1: Make observations on the appearance of your mushrooms. Have students review their hypothesis and decide if it was proven or not.
Step 2: Cut a mushroom for each student or table group to feel. Always have students wash their hands after handling mushrooms, particularly if they are unknown. Mushrooms must be consumed to be poisonous, but because they grow in decomposing material, good hygiene is important.
Step 3: This is a good place to add an extension activity of making a spore print. This article over at Treehouse Magazine has a great PDF on making spore prints.
Step 4: Harvest all the mushrooms that are ready. The dome over the block can be misted daily and may continue to produce flushes of mushrooms for another month or two. Or you can move immediately on to the second part of the experiment.
These mushrooms should be edible, but if you have any that do not look like you were expecting, do not eat them. In a classroom setting, contamination with wild spores is possible. Mushrooms should be cooked before consuming.
Step 5: Have students complete their KWLW chart with what they learned and want to know next.

Procedure Part Two
In this part of the experiment, you will work to colonize more substrate with mycelium. The sterilizing prep should be done ideally right before you intend to do the lesson. Because this step involves high heat, it may be best to do it away from the students.
This part of the lesson can also be done with purchased spawn and bulk substrate rather than using fruiting blocks. Purchased spawn ranges widely in concentration. If you are going this route, follow the instructions that come with it for the proportions of spawn to substrate.

Supplies:
- Additional tray or trays with humidity and blackout domes for each additional substrate you will attempt to grow in.
OR
- Glass jars with lid rings and coffee filters.
- Sterilized substrate
- Bulk mushroom spawn or fruiting block.
- Nitrile gloves (optional)
Step 1
Sterilize your chosen growing substrate from the list below.
- Coffee grounds
- Straw
- Cardboard
- Sawdust
- Hardwood chips
- Wheat Bran
- Coco Coir
To properly sterilize the substrate and avoid contamination, you will need to maintain a temperature of at least 150℉ for two hours. The simplest way to do this for small quantities is on the stove in a large stock pot with a lid.
- Place about 25 cups worth of substrate in a large pot. This is enough for one to two 1020 trays. If using jars, this amount can be reduced.
- Fill with water to cover and bring to a boil.
- Cover and simmer on low temp for 2 hours. Add water if needed to keep covered.
- Drain excess moisture and cool.
- The moisture level should be similar to a wrung-out sponge.
- Place in a clean container until ready for use. (Should be inoculated as soon as possible to avoid mold growth.)
Day 1:
Review the appropriate vocabulary with your students.
Have students come up with new hypotheses based on the substrates you will be using. IE. The coffee grounds will not grow mushrooms. The straw will grow different kinds of mushrooms.
Any hypothesis is valid as long as the results are observable and measurable.

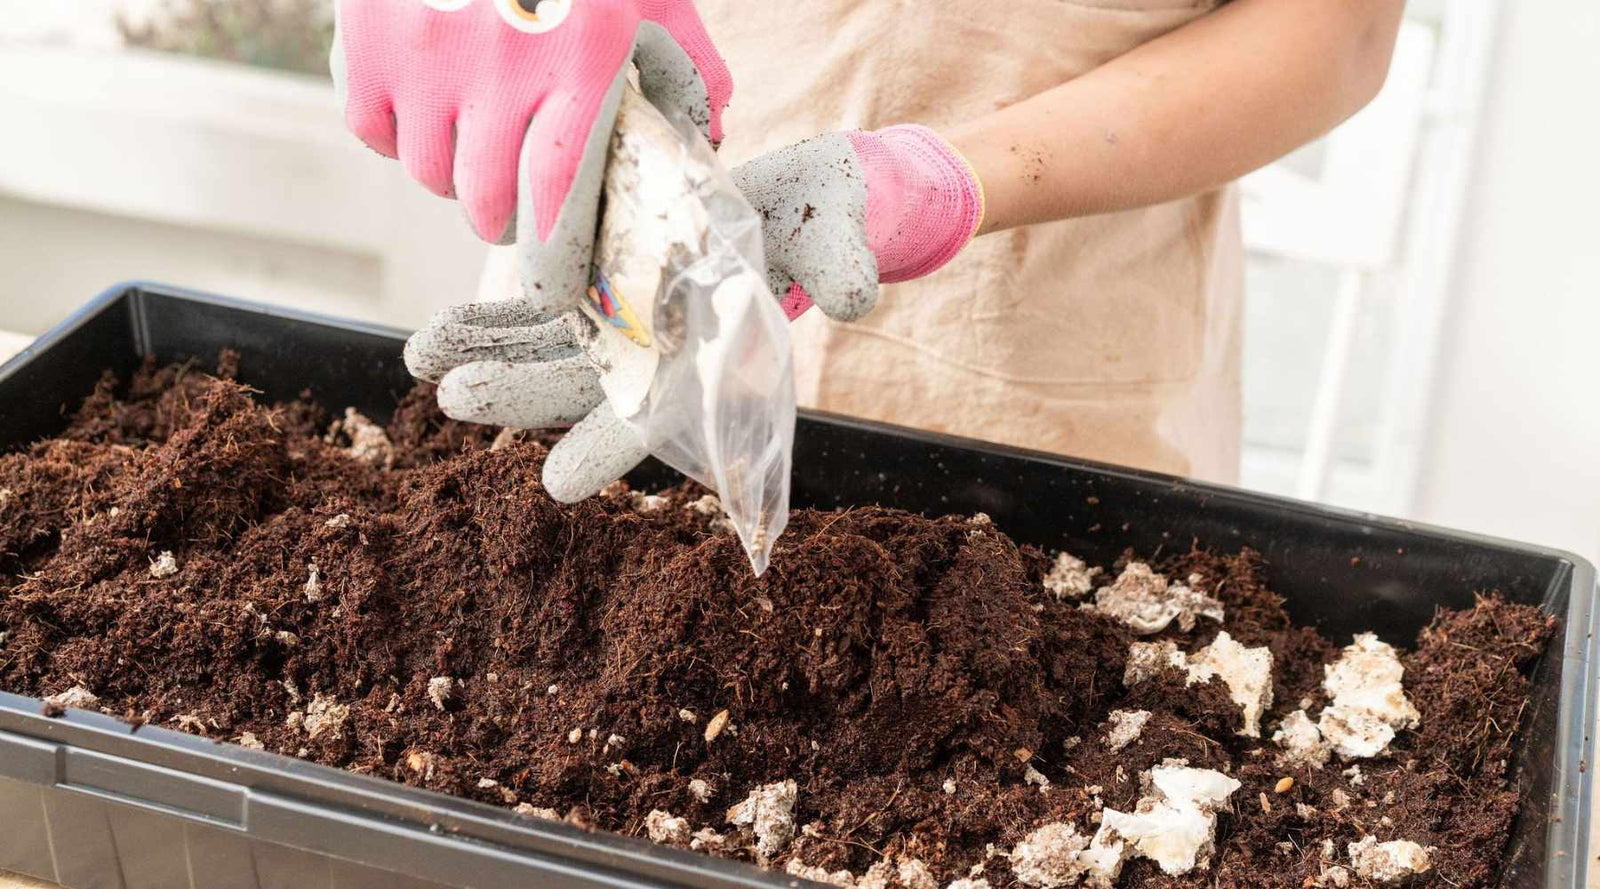
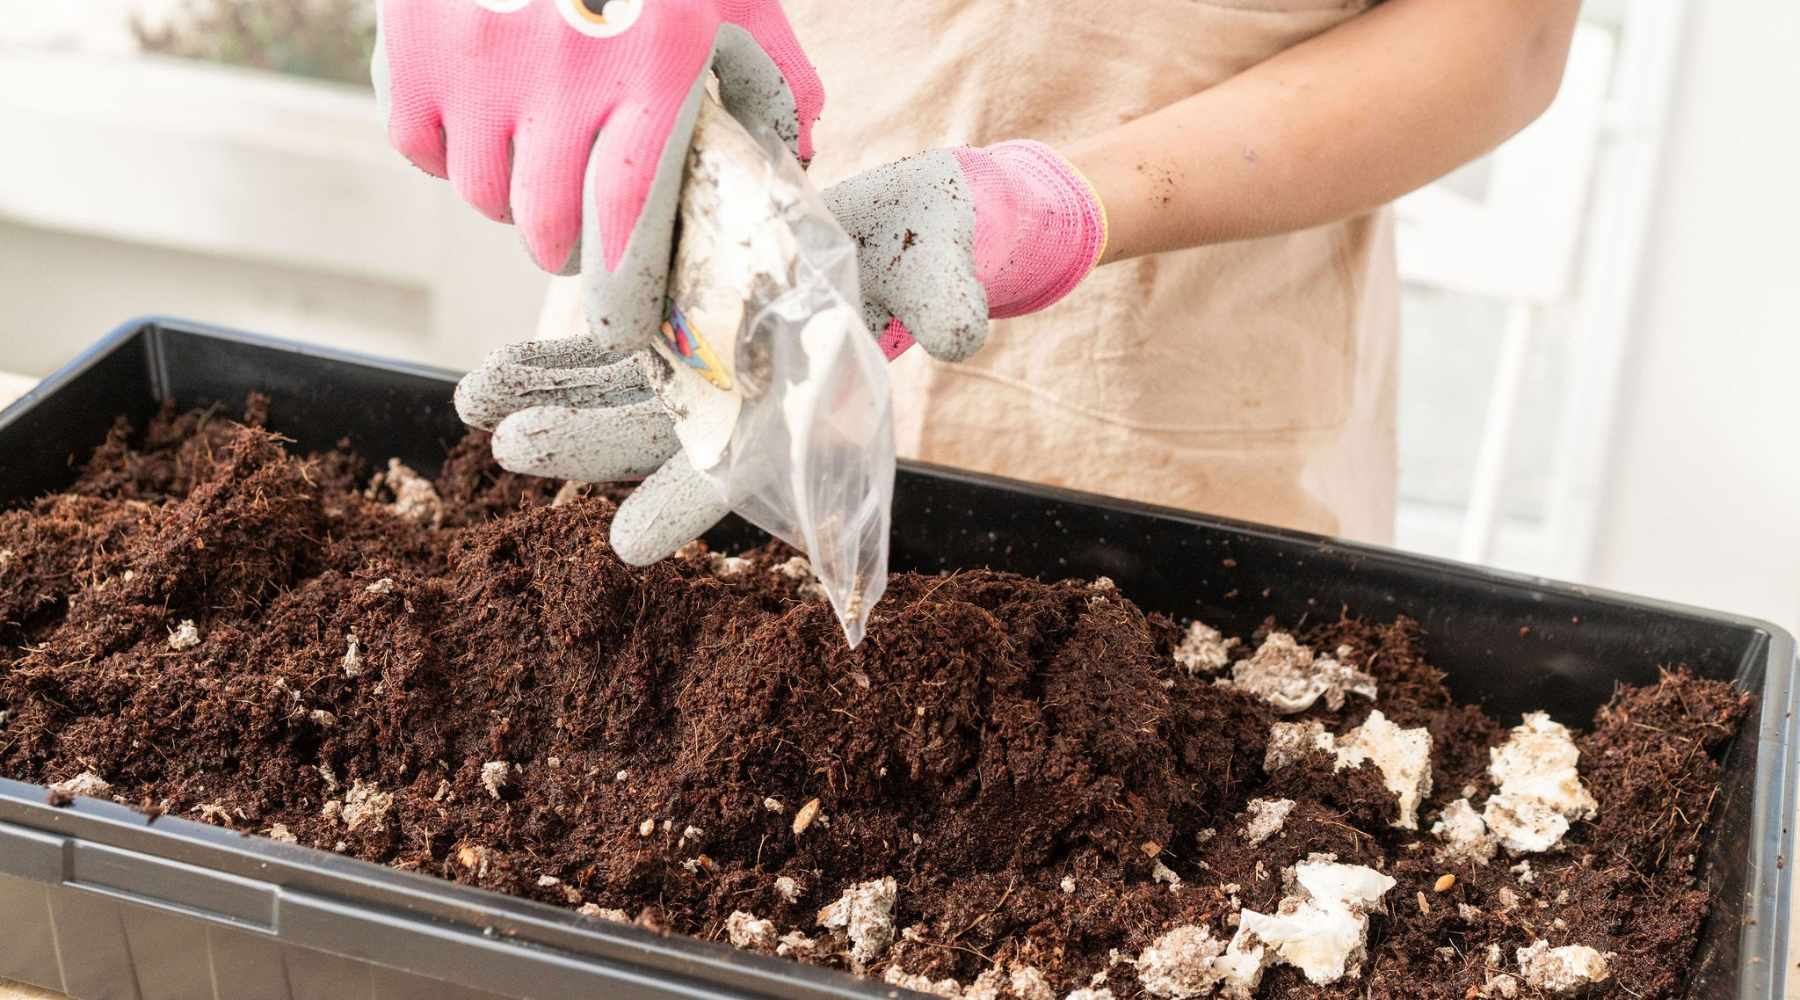
Step 2:
- Using clean or gloved hands, break up your spawn (or substrate block) into small pieces.
- Mix the spawn with your sterilized substrate using at least 20% of your fruiting block to 80% moist substrate. The more spawn you use, the faster it will colonize the substrate but it may run out of food before it fruits at high concentrations. If you are using purchased spawn, stick to the suggested ratios.
- Place the mixed materials into your mesh growing trays and place them inside your 1020 trays without holes. Cover with the blackout domes
Or
- Fill your jars with the mixed material and cover with at least two layers of coffee filters held down with the lid rings. Wrap the jars in fabric or paper to prevent light from reaching the growing mycelium.
- Place your new substrate-filled containers in a cool place out of direct light. A range of 55℉-70℉ is ideal for mycelium growth.
Days 3-14
Step 3:
Check on the mycelium growth every day. Have students make observations regarding how the mycelium is colonizing the substrate.
If you see mold growth that is different than the thready, white mycelium, you may have a contaminated substrate. This can be kept growing for observation, but resulting mushrooms should not be consumed.
When the mycelium has completely colonized the substrate, you can move on to fruiting the mushrooms. The colonization can take anywhere from 7-14 days.
Day 15+ or Day 1 of the fruiting phase.
Step 4:
- If using trays, Replace the blackout domes with the humidity domes and keep the vents open for airflow. Using your spray bottle, mist the inside of the humidity dome and place it over the block.
- If using jars, Remove the light-blocking material but keep the filters on until Pins begin to form at the top of the substrate. Mist the filter daily.
- Follow the instructions for fruiting mushrooms from part one of this lesson as follows.
Days 2-7 of the fruiting phase:
- Always wash hands before and after handling mushroom growing equipment.
- Lift the lid on each tray and make your daily observations.
- Mist the inside of the humidity dome 1-3 times per day. Do not spray water directly on the substrate block or mushrooms. The ambient humidity and growth stage of the mushrooms will affect how frequently you need to mist them. Rooms with air conditioning will be less humid and require more frequent misting.
- Once the mushroom pins begin to form, you can begin taking measurements. They grow quickly, so this can be done more than once a day if you like.
It may take longer for your mushrooms to mature. If so, continue with observations until the mushrooms are ready for harvest.

Day 8 of the fruiting phase:
This process is the same as part one of this activity, but depending on your substrates may happen on different days for the different substrates.
Depending on your growing conditions, your mushrooms will be ready for harvesting, and the next steps between 8-10 days.
Oyster mushrooms are ready for harvest once the outside edge is curled under and feels similar to the curve at the top of your ear. Heat, humidity, and light will all play a part in the speed of growth.
Step 1: Make observations on the appearance of your mushrooms. Have students review their hypothesis and decide if it was proven or not.
Step 2: Cut a mushroom for each student or table group to feel.
Step 3: This is a good place to add an extension activity of making a spore print. This article over at Treehouse Magazine has a great PDF on making spore prints.
Step 4: Harvest all the mushrooms that are ready. The humidity cover can be misted daily and may continue to produce flushes of mushrooms for another month or two.
These mushrooms should be edible, but if you have any that do not look like you were expecting, do not eat them. In a classroom setting, contamination with wild spores is possible. Mushrooms should be cooked before consuming.
Step 5: Have students complete their KWLW chart with what they learned.
Step 6: Have student review their hypothesis and whether it was proven or disproven.

Extension Activities
These can be done in conjunction with this experiment or after the fact as additional experiments on the same theme. When doing additional experiments, be sure to label your control and variable trays clearly so observations can be taken accurately.
- Use the colonized growing media as your variable to grow. For your control, use an equal amount of coco coir/coffee ground mix that has not been colonized by mycelium. This shows that the mycelium is where the mushrooms come from.
- After a few rainy days, take your students out for a mushroom hunt. Anywhere that there may be decomposing wood is a good place to look. Use a field guide for your area or an app like iNaturalist or Shroomify to try to identify your finds. Do not eat wild mushrooms unless you have a skilled mycologist on hand to confirm identification.
- Make spore prints of mushrooms. Make sure students wash their hands after handling any mushrooms.
Remember that mushrooms must be consumed to be poisonous, but because they grow in decomposing material, good hygiene is important.
Resources
Mushroom growth can be very hard to visualize as so much of their life cycle takes place underground. Here are some videos from Cornell University that we have found super helpful in understanding how the process works at scale.
Growing Oyster Mushrooms Indoors - INTRODUCTION (1 of 5)
This Guide from the National Forest Service is a nice source of images and information for fungi from the Pacific Northwest.
This guide from the USDA Forest Service is for Common Macrofungi of Eastern Forests.

Places to get your fruiting blocks
These are a few of the reputable companies where you can get fruiting blocks of mushrooms. We always encourage you to order from companies close to you if you can.
North Spore in Maine:
https://northspore.com/collections/shop
South Dakota:
https://dakotamushrooms.com/collections/shop-mushroom-grow-kits
California:
https://backtotheroots.com/collections/organic-mushroom-kits
https://farwestfungi.com/collections/mushroom-grow-kits
Washington:
https://cascadiamushrooms.com/collections/mushroom-growing-kits
https://www.mycouprrhizal.com/store
West Virginia:
https://hernshawfarms.com/collections/grow-kits
Wisconsin:
https://www.fieldforest.net/category/ready-to-fruit-mushroom-kits
Canada: