Propagate Raindrop Peperomia: The Ultimate Guide for Beginners

Understanding Raindrop Peperomia
This unique houseplant originates in the tropics of Columbia, Ecuador, and Peru, where it’s hot and humid. It is non-toxic for pets and humans, as it is part of the pepper family. While Raindrop Peperomia doesn’t lend itself as worthy of consumption, some species have cinnamon or mint tastes used culinarily around the globe.
While she can be finicky initially, she’s a dream plant once you master her care and maintenance. We’ll discuss all her quirks, how to care for her, and how to propagate new baby Peperomia plants so you can share the joy with friends and family.

What is Raindrop Peperomia?
Peperomia Polybotrya, also called the raindrop plant, is a glossy, medium-green houseplant whose plump leaves cascade in full, lush vines resembling raindrops.
It’s the perfect plant for an office, bakery, or saloon where natural light is limited and fluorescent lighting is ample because it thrives under bright, indirect light and high humidity.
Why Propagate Your Own Peperomia Plants?
If you love houseplants, learning to propagate them is a fun hobby. Fill your home with fresh, new baby plants, share them with friends and family, or start a side hustle selling them at your local farmers’ market or online. Propagation takes patience and time, but you could probably do it in your sleep once you get the hang of it.

Step-by-Step Propagation Guide for Raindrop Peperomia
Divide this unique houseplant by taking leaf cuttings, stem cuttings, or dividing an established plant. Determine your method based on your experience, time of year, as well as the age and condition of your current plant. All three methods can be done using water or soil, and unlike lots of popular houseplants, a node isn’t required! While I mention cutting above a node in the stem-cutting method, it’s not a requirement but a general best practice for propagating plants.
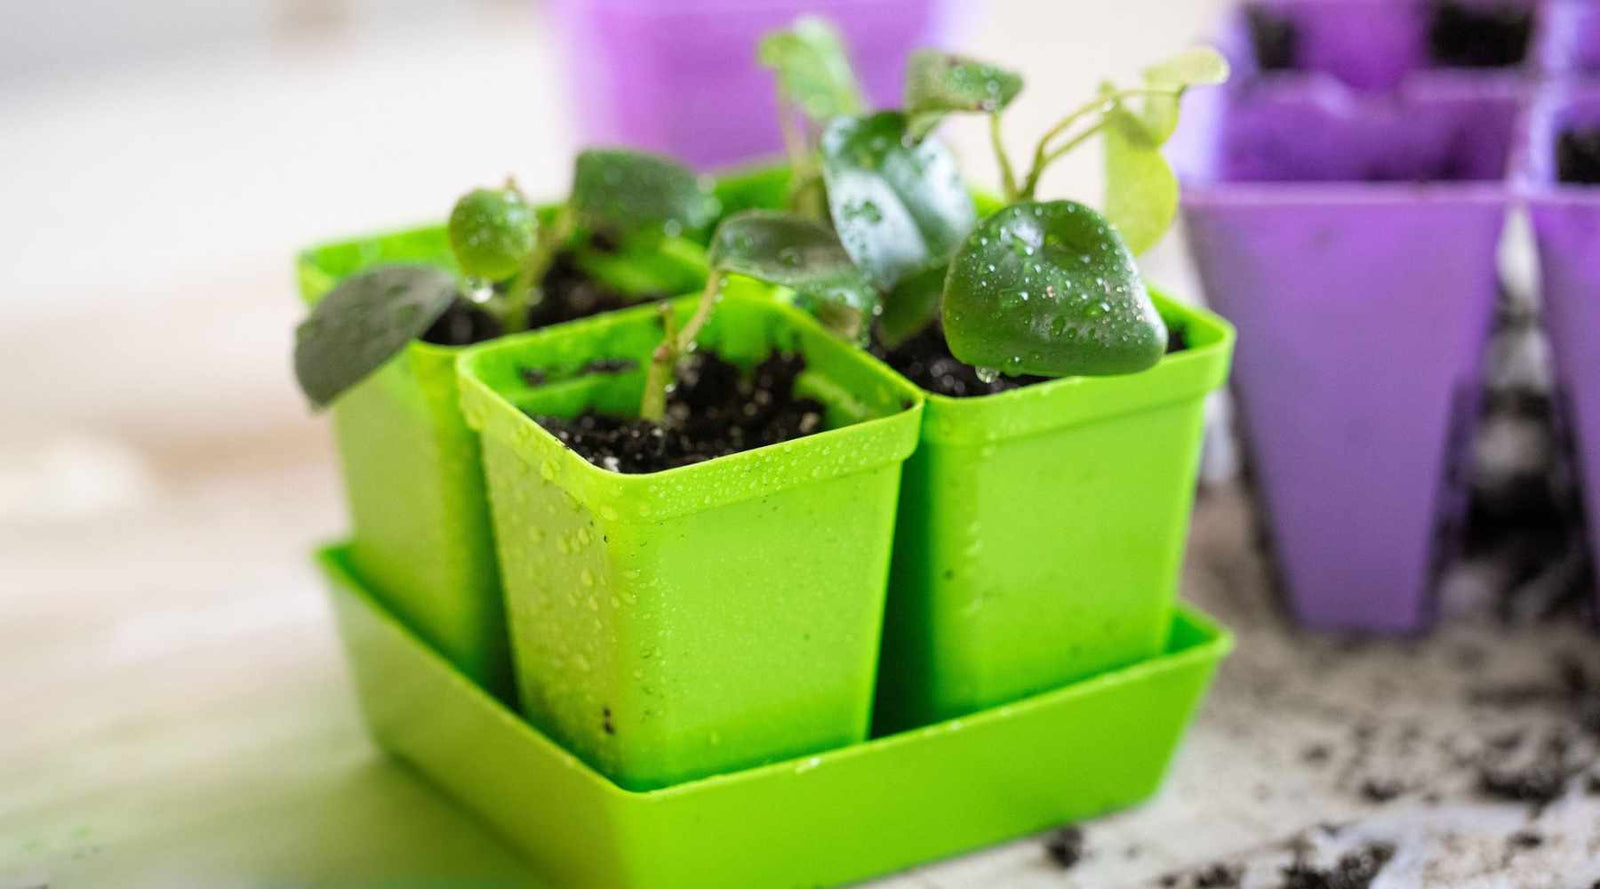
You’ll only need a few supplies, including sharp, clean shears or scissors, receptacles with clean water, or small pots with fresh soil. Using Bootstrap Farmer’s 4-cell plug tray inserts sets you up for great success when propagating new plants with stem cuttings for their depth and air-pruning capabilities. Their 5X5 shallow microgreen trays and plant humidity domes work wonders when working with leaf cuttings.
Let’s discuss each of the methods now.

Leaf Cutting Method
This is precisely what you might think from the name. Locate a healthy, mature leaf on an established plant. Snip the leaf off with clean, sharp shears or scissors, leaving a few inches of stem on. The open wound is susceptible to rot, so allow the end to dry overnight to reduce this risk.
-
To propagate in water, submerge the end into a mason jar or similar-sized glass, keeping the leaf dry. Change the water weekly or as needed, and place it in a warm spot away from drafts. Avoid direct sunlight. Pro tip: Clear containers allow you to monitor the roots forming without removing the cutting.
-
To propagate in soil, prepare a ceramic pot or seed starter pots - 2.5” extra strength with fresh potting soil. Remember, it should be light and airy. If you only have regular soil, add perlite or peat to boost its drainage capabilities. Lightly water so the soil is moist but not soggy. Some people add a plastic baggie dome over the plant to help retain moisture and humidity as it roots. This is optional, and you can experiment using one or not. Check it often for signs of mold.

Stem Cutting Method (most popular method)
Like leaf cutting, this method involves cutting off a healthy section of stem that features several leaves. A node is a section along a stem where new leaves will form. They start out looking like small nubs. When selecting your stem section, cut with a high quality set of pruners below a node, then remove any leaves below it.
Follow the same water and soil propagation listed above for leaf cuttings. Optionally dip the end of the cut stem in a rooting hormone powder to assist with new root formation before adding it to potting soil. Note that this is not approved for organically certified growers. For more organic methods for encouraging rooting be sure to read our recommended use of natural root growth stimulators in How to Propagate Roses from Cuttings.
Pro tip: If your plant becomes leggy and you are pruning off leggy stem sections, consider using these to propagate new plants instead of discarding them!
Division Method
Your Raindrop plant will have doubled every few years and should be split and repotted. You’ll know it’s time to divide the plant if it starts showing its roots from beneath the soil. This is a sign that your plant is asking for more space.
-
Prepare a pot with fresh soil and a larger container for repotting the established plant.
-
Remove the plant from its pot.
-
Brush off the loose soil from the root system.
-
Separate the roots and identify mini-plants.
-
Use clean, sharp shears to remove the mini plants from the mother plant and untwist their roots. Note that there may be more than one mini-plant.
-
Pot the mini plant(s) up in your prepared pots.
-
Water gently and place them in a warm, cozy spot out of direct sunlight. If necessary, add a stake for support.
-
Repot your mother plant with fresh soil.
-
Enjoy your new plant(s)!
Use the split to start a new plant for yourself or gift it to a friend or neighbor. Need a housewarming gift? Houseplants are the perfect solution.

Caring for New Propagations
Treat newly propagated plants like babies because that’s what they are! For high success rates, propagate during the growing season when new growth occurs naturally and conditions are ideal.
Looking for more plants to propagate? Check out our favorites in our article on the 10 Must-Have Indoor Houseplants for Gardeners and Plant Lovers.
Immediate Post-Propagation Care
Place your new cutting in a light area but out of direct sunlight. Keep them away from strong, cold drafts, fans, and doors that open often. The environment should remain as stable as possible.
Leave your cuttings alone for the first couple weeks as they settle into their new homes, only ensuring the light is ample, the soil doesn’t dry out, and no visible mildew or mold is forming. Not much occurs in weeks one and two. More activity will occur between the third and eighth weeks, including stabilizing roots forming and possible new growth. Cuttings set in soil should set roots in four to six weeks.

Signs of Healthy Growth
If you start to notice new growth above the soil or water levels, like new nodes and leaves forming, you’re probably in the clear and have successfully propagated your raindrop plant. Other indications of healthy plants include a pest-free zone without yellowing leaves.
Once the cuttings are established and healthy, pot your water-propagated cuttings into a pot with fresh soil whenever you’re ready. Cuttings added to fresh soil should survive just fine in that pot for several years before moving to a larger container. In fact, Peperomia plants don’t mind being a little bound up, and they tend to grow slower than other popular houseplants you might be familiar with.
Pro tip: If you choose, they can live indefinitely in water. Just be sure to monitor water levels, change the water often, fertilize them as needed, and move them into a larger container if necessary. This is an excellent method for holding cuttings for future gifts or when you’re not ready to pot them up yet.

Watering Schedule
A watering schedule is essential for all plants, indoors and outdoors. Taking notes on when and how much you’ve watered your new Raindrop plant will help guide a future schedule as you get used to her needs without overdoing it. Monitor your plant daily or every few days at first and feel the soil, allowing it to dry out between sessions, but before the plant displays signs of dehydration like wilting. Established plants can be watered once weekly with a high quality sprayer or every other week, but the exact timing will depend on their growing conditions and climate.
The succulent-like leaves of the raindrop plant hold water, so use well-draining soil. If you can find soil blended for African violets, it will also suit this plant’s needs because of its improved aeration and light consistency. Don’t skimp on the humidity levels just because they prefer their soil a little on the dry side. Humidity levels should remain moderate and constant. We strongly encourage growers with particularly dry homes to position a humidifier or a water mister nearby.
Light and Temperature Needs
As mentioned, the raindrop plant thrives in bright, indirect sunlight, so finding the right location is crucial to its success. Harsh lighting may cause discoloration and burning. The green leaf flesh requires proper light to remain bright and glossy.
Raindrop plants prefer warm weather and moderate to high humidity, which makes it difficult for some growers to grow them successfully. Drafty, cool, dry homes aren’t conducive to these tropical lovers. They’ll thrive when temperatures range from 65 to 80°F (18 to 27°C) with as few fluctuations as possible. Introducing plants to temperatures below 60°F (15°C) is not advised.
Feeding and Fertilization Tips
Avoid fertilization until your plant established solid roots and above-soil growth. Feed healthy plants about once a month, and cease any fertilization in the winter, when growth naturally slows.

Troubleshooting Common Problems and Solutions
Growing raindrop plants may involve a few common avoidable issues. Let’s discuss some of them and ways to avoid them.
Yellowing Leaves
This is usually a sign of overwatering, a common culprit among new houseplant growers. Lean on the side of less water rather than more, which can lead to more issues. If the soil isn’t completely dried up, the plant should have plenty of water. You may also be underwatering if leaves are yellow and crisp.
Stress caused by pest infestations, too much light, and temperature fluctuations may cause yellowing. Pests can remove moisture from your plant’s soil, so regular pest checks when watering are advised.
Yellowing leaves may also result from nutrient deficiency. Get a home soil test to ensure your plant doesn’t need nitrogen, calcium, or magnesium, which can cause color loss.
Slow Growth
While raindrop plants can tolerate and adjust to low light situations, growth will be severely stunted if insufficient. This issue sometimes causes houseplant parents to water and feed more, which causes different problems altogether. Confirm the issue, and if you’re not sure, ask a houseplant expert. Then, take swift action.
Root Rot Prevention
Overwatering is a common mistake among new houseplant owners and a leading cause of root rot. Avoid allowing the soil to become soggy, but keep it moist. Before watering, use the two-finger soil test by pressing a few fingers into the soil a few inches. If soil remains on your fingers, there is ample moisture, and you can wait to water. If no soil remains, it’s time to water.
Legginess
All plants need light and they’ll do anything to get it, including stretching their necks to reach it. Stems will become long and “leggy” over time. If caught and swift action is taken, plants can recover from legginess. Move artificial lighting down so they don’t have to work as hard or change their positioning to receive more sunlight.
Scorched/Crispy Leaves
On the contrary, plants can become burned with too much harsh, direct light. Find a happy medium so plants get enough light but it’s not too close or strong that burning occurs.
FAQs
Can raindrop peperomia propagate in water?
Yes, you can place stem cuttings in water in a spot with lots of indirect sun. Roots should begin forming within a few weeks. To keep the water clean, change it at least once a week.
How long does it take to see new growth?
Roots can appear in two weeks but take as long as six. The length of time before seeing new growth depends on the environment.
What is the best time of year to propagate peperomia?
You can propagate at any time, but new growth will occur faster during active growth in spring and summer.
How do I know if my cutting is successful?
After potting your cutting up in fresh potting soil and watering it in, monitor it weekly by gently tugging on the stem. If its roots are successfully anchored in the soil, it won’t budge too much. However, if the stem easily slips out of the soil, it needs more time. If you’ve checked several times over a few weeks and the roots lack fresh, white growth, it didn’t take. Alternatively, you can use clear pots so that you can see root growth without pulling on the stems.
Note that if you put a stem or leaf cutting directly in soil without allowing it to form roots in water first, lack of warmth may cause rootlessness.
Can I propagate raindrop Peperomia in direct sunlight?
Newly propagated cuttings and potted-up seedlings should be kept out of direct sunlight. Raindrop plants prefer indirect but bright sunlight.
How do I make my Peperomia bushier?
Regular trimming and pruning will encourage new growth and the formation of additional nodes, resulting in a bushier, fuller Peperomia plant. Prune how you would a basil plant, cutting the main stem below a node. The plant will send out two new shoots where you cut, doubling the size of the growing tip.