20% Off USA-Made All-Metal Greenhouse Kits until May 31
20% Off USA-Made All-Metal Greenhouse Kits until May 31
Managing a Greenhouse | Regulating Humidity & Temperatures
January 20, 2025 12 min read 0 Comments

Keep your greenhouse or hoop house cool in the summer and warm in the winter.
Managing greenhouse humidity and temperatures is crucial in changing climate and for extending the growing seasons. Traditional greenhouses don’t offer much insulation, so farmers have found creative ways to heat and cool greenhouses.
Let’s explore ways to automate your greenhouse and why that’s essential, tools that will give you peace of mind, and tips and tricks to help you keep your plants and work-life balance healthy while managing an energy-efficient business.
AIR CIRCULATION
Air circulation promotes healthy air quality by keeping levels of CO2 suitable, humidity levels regulated, and temperatures consistent. It also keeps your greenhouse from reaching the dew point when air vapor condenses on your plants. Dew spreads fungal disease when spores can move freely through the water on plant surfaces.
HORIZONTAL AIRFLOW (HAF) FANS
Also known as greenhouse circulation fans, these are positioned at or above plant level, running 24 hours a day when plants are present until the weather allows doors to be opened and the sides to be rolled up. Work with a professional to determine the number and placement of fans needed to ensure air flows in a continuous, circular motion, avoiding hot or cold pockets.
HAF fans dry the air out and control the humidity levels in the greenhouse. Running the fans while the sides are rolled up may inhibit the natural airflow from the outside breeze. If you have both of these items automated, set the control to turn the fans off when the sides go up to save on energy and keep the air flowing efficiently.
Bonus: The wind created by the fans helps bulk up tiny seedlings, preparing them for hardening off outdoors. Turn down the level or adjust the fan height if the soil is drying out.
VENTILATION
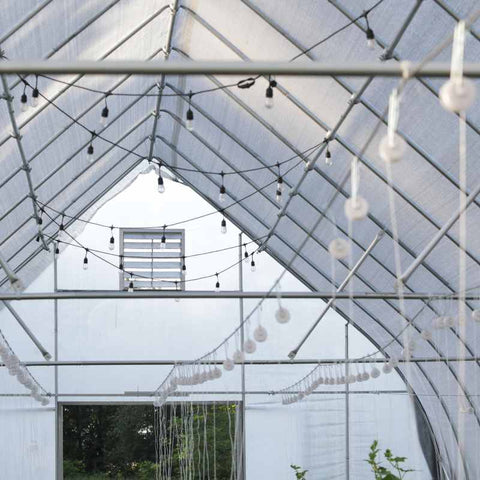
Ventilation is essential for moving fresh air in and stale air out. Proper greenhouse ventilation will help plants breathe, photosynthesize, and grow. It also helps maintain the desired temperature and humidity levels, decreases the risk of fungal disease, and may help with pest control and pollination.
RIDGE VENTS
Installing a ridge vent is not a requirement, but it’s the quickest and most effective way to ventilate hot air out passively. Our intake shutters can be installed above the doors or the peak of a gothic hoop house kit and opened manually with a string tied to the spine for passive ventilation.
SHUTTER EXHAUST FANS
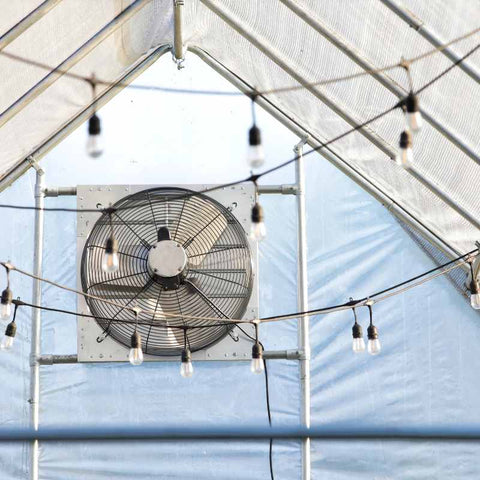
Shutter exhaust fans sit at the highest point of the greenhouse to pull out the hottest air in the building and allow new, cooler air to enter, providing active ventilation. These fans should be set to kick on if temperatures exceed a specific level, to be adjusted throughout the year, depending on the outside temperatures and what crops are growing. Using a greenhouse fan thermostat is the most effective way to automate this process.
INTAKE SHUTTERS
If you have an exhaust fan, you must have intake shutters or gable vents to allow fresh air in. Our aluminum intake shutter flaps will automatically open into the greenhouse when the exhaust fan starts. This avoids the vacuum effect created by the exhaust fan alone being on sucking air out with no way for fresh air to come in.
Opening gable vents when it’s cold outside may seem counterintuitive, and I’ll admit, I was skeptical when we installed our first high tunnel and left the vents open year-round. However, allowing your greenhouse to let warm, stale air escape naturally is essential in the exchange of oxygen and CO2.
Hot air naturally rises. When there is a significant difference between the warm air at the top of the building versus the cooler air near the bottom, buoyancy aids in ventilation as the cool air warms and rises, becoming lighter as it does. When roof vents are open, warm air escapes as the cooler air enters through the side walls. While humidity levels are more challenging to control when buildings are closed up and outside temperatures are cool, controlling temperatures indoors is quite simple with proper ventilation.

ROLL-UP SIDE WALLS
The side walls of a greenhouse typically roll up to a hip board about five feet high to allow natural airflow into the building. Depending on where your farm is and the time of year, you may be rolling them up with a hand crank in the mornings and down again in the late afternoon. In many places, they will be opened in the late spring and left rolled up throughout the summer. You can also automate this with an automated roll-up system connected to a thermostat.
MONITOR HEAT AND HUMIDITY WITH WIRELESS SENSORS
A wireless sensor will give you peace of mind while away from the farm. We keep an HT.w SensorPush sensor near the trays so we can track the temperature and humidity levels remotely. This helps us determine if the temperature is correct, if everything is working properly, and identify real-time issues.
A more advanced system will also allow you to make changes remotely but would require additional professional work. Set up notifications when temperatures or humidity reach certain levels to alert you of any issues.
Note: You will need WiFi in the greenhouse or an extender from your home to use wireless sensors.
AUTOMATE BASED ON SENSOR DATA
Everything you add to your greenhouse can be automated with the proper setup and equipment. This will give you peace of mind when you’re away from the farm or during inclement weather. Set exhaust fans, vents, HAF fans, roll-up side walls, and heat mats to activate when temperatures and humidity reach a set level.
Pro tip: Setting your level just above the dew point will exchange humid air before it condenses and starts to cause issues.
END WALLS AND DOORS
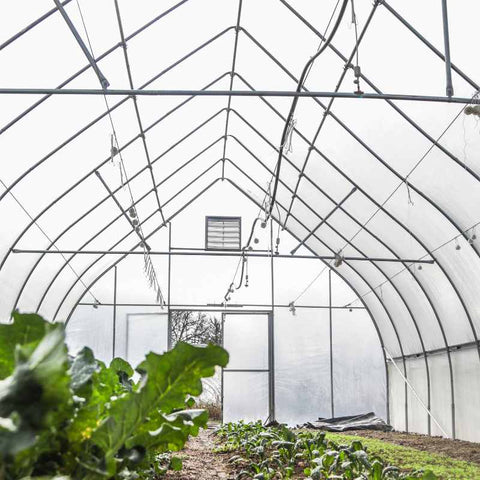
Consider the insulation properties of the materials you choose for your end walls and doors. The R-value of end walls and doors increases the average of the entire structure. Below are options to consider.
SINGLE LAYER POLY
The R-value of single-layer poly is about .85. Adding heat to a single-layer poly greenhouse is like blasting your heat when all the windows are open. Single poly is recommended in unheated tunnels to grow cold-hardy crops and works well in warmer growing regions.
High-diffusion plastics evenly diffuse sunlight, avoiding hot spots that potentially burn crops. This type of plastic can be particularly beneficial for northern growers and are commonly used in the floral industry.
DOUBLE LAYER POLY
When an air blower is added between two layers of poly plastic, some snow shed capabilities may be added, and the R-value increases to about 1.25. However, this feature costs more upfront and air blowers must run 24 hours a day, which will cost you in electric bills.
POLYCARBONATE PANELS
These are often used for greenhouse end walls and doors because they’re heavy-duty, easily accessible, and withstand strong weather. Anti-condensation protection may be offered to help with humidity levels and light transmission. However, if you plan on heating your greenhouse, these panels won’t offer much more insulation than single-layer poly plastic.
REFLECTIVE FOAM BOARD
Silver-backed foam board can easily fit between bays of a framed end wall. Add additional layers to reach your desired R-value. Foam boards are a radiant barrier, reflecting sun and heat around the greenhouse. It’s easy to work with and is sold at your local hardware store.
R-VALUE DATA
The chart below shows how the average R-value of the entire structure drastically increases as the R-value of the end walls goes up. If you can get your end walls to an R-30 to R-35, the average 100-foot tunnel increases to 3.98, about 4x the amount of single-layer poly. Extend your season by adding heat, but do whatever it takes to insulate as much as possible to hold that heat inside.
| Total Surface Area | % of main structure | Endwall % of structure | Avg. R-factor w/R-30 endwalls | Avg. R-factor w/R-35 endwalls | Avg. R-Factor with 8mm DW PC* 1.4 R-factor | |
|---|---|---|---|---|---|---|
| 20ft endwall | 196 | |||||
| 20' | 1180 | 0.67 | 0.33 | 10.77 | 12.43 | 1.27 |
| 40' | 1900 | 0.79 | 0.21 | 7.14 | 8.17 | 1.24 |
| 60' | 2620 | 0.85 | 0.15 | 5.51 | 6.26 | 1.23 |
| 80' | 3340 | 0.88 | 0.12 | 4.58 | 5.17 | 1.22 |
| 100' | 4060 | 0.90 | 0.10 | 3.98 | 4.46 | 1.22 |
*Polycarbonate 8mm double wall PC panels 1.4 R-factor
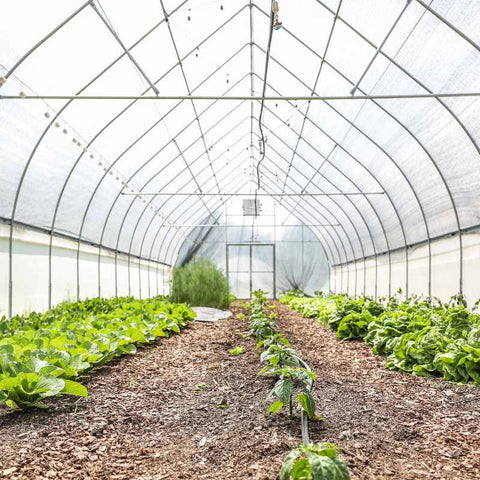
TEMPERATURE CONTROL IN A HOOP HOUSE OR GREENHOUSE
Now that your air circulation and ventilation are under control, let’s manage the temperature.
HEAT MATS
Heat mats provide heat to the seedling root zone and are a low-cost way to start your season without heating your entire greenhouse. They’ll also control the amount of excess condensation on plant surfaces. Plug them into a temperature controller that you can adjust based on what’s growing. They will cycle on and off to maintain the desired temperature.
Early season, cold-hardy crops like Swiss chard, kale, and bunching onions only need heat around 60-70°. If you experience a daytime temperature spike, lower it temporarily to avoid soil drying out. Some heat mats can only heat trays to 15° above air temperature. Use a secondary heat source as needed.
Ensure your heat probe is secure in a cell and that the tray is properly moistened. If the probe pops out, it will read the air temperature and cause the heat mats to remain on at a high temperature, potentially frying your seedlings. We highly recommend taping your probe to the table as well to avoid excess heating if it comes loose from the soil.
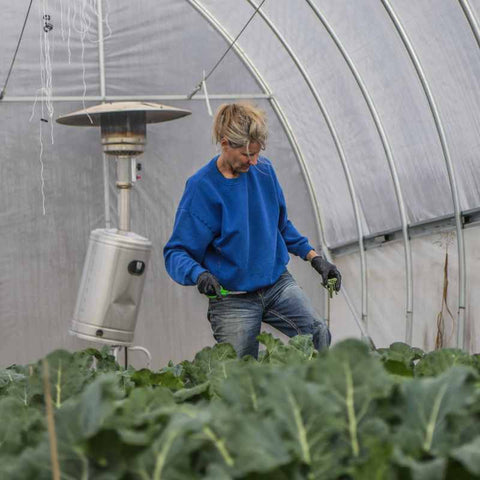
PROPANE HEATERS
This is the way greenhouses are traditionally heated. Select one based on the size of your greenhouse. Don’t assume bigger is better here! When these heaters are constantly cycling off and on, they aren’t performing at their peak efficiency. Choosing a larger version because it’s on sale or you think you’ll increase your space in the future will leave you disappointed with the results. Before selecting a size, ask a professional to calculate your potential heat loss. Propane heaters are typically hung at one end of a greenhouse to take up the least space.
ELECTRIC HEATERS
While these aren’t typically used, they’re a great option for small-scale farmers to consider. Some electric heaters are set to a level 1-5 rather than an exact temperature, which may take some getting used to. When temperatures are still quite cold outside, we set ours to 3 overnight to keep our greenhouse around 60° in zone 5b. It cycles on until the desired temperature is reached, and then it cycles off.
Experiment with the different levels and what temperature it can maintain, which will depend on the size of your building and growing zone. Adjust as needed. Keep the area around any heater clear for safety and efficiency.
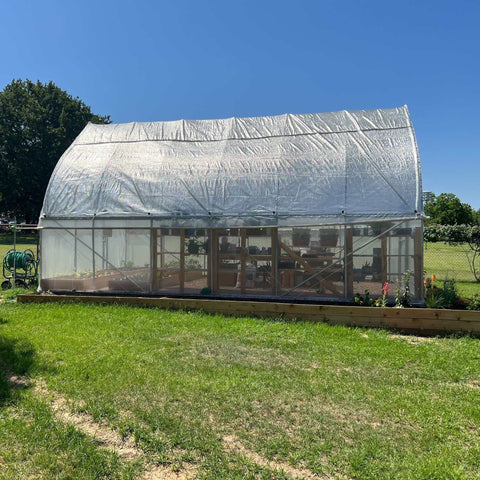
SHADE CLOTH
Shade cloth is the most efficient way to manage temperatures inside a greenhouse during the warmest months. We recommend black 30% shade cloth for northern growers and 50% for southern growers. Black shade cloth diffuses direct sunlight and protects your crops from UV rays while increasing ventilation, cooling the greenhouse, increasing water retention in the soil, and reducing water usage.
White shade cloth reduces the light coming through by about half but doesn’t affect the light spectrum quality important for plant growth. These are typically used when growing flowering plants or over patios in hot climates.
These can be ordered to the shape and size of your greenhouse and fit comfortably from hip to hip using clips. Alternatively, check out our video on how to install shade cloth using channel locks and spring wire. If you have questions about how best to mount or secure shade cloth to your greenhouse, reach out to our team for assistance.
AVOID STANDING WATER AND CONDENSATION
Avoid standing water anywhere in the greenhouse, as this will evaporate into the air, settle on plants, and increase humidity levels. Many modern greenhouse plastics have anti-drip and anti-condensation treatments that allow water to drain off rather than drip onto your plants and working surfaces. Ensure your floor is pitched or has a drain and your roof is pitched steeply enough to allow run-off.
DESIRABLE HUMIDITY LEVELS IN HOOP HOUSES AND GREENHOUSES
Ideal humidity levels vary with the outside temperature. According to the University of Massachusetts Amherst, below is a chart of humidity levels corresponding to temperature to best prevent disease.
|
Degrees in Fahrenheit |
Humidity level |
|
50° |
83% |
|
61° |
89% |
|
68° |
91% |
|
86° |
95% |
WINTER HEAT MANAGEMENT
Once your greenhouse is sealed up for the winter months, it becomes even more important to control humidity and temperature and keep healthy air flowing. Continue venting and cracking the doors on warm days to allow stale air to escape.
Here are a few things you can do to help keep the heat in when growing in the winter.
SECURING THE SIDES
Wiggle wire is an economical, safe, and easy way to get a tight seal on your building, keeping warm air in and drafts out. Ensure wiggle wire and lock channels are in working order before closing the greenhouse. Use greenhouse plastic repair tape to repair any damaged plastic.
Identify new gaps and cracks and seal them up before winter. Drafts that come through these could severely affect crops in that area and allow critters in. Corner wind panels are recommended to help strengthen the corners, reducing the amount of drafty air, rain, or snow drifting in. In addition, wind bracing can be added along the entire length of the tunnel for more general wind defense.
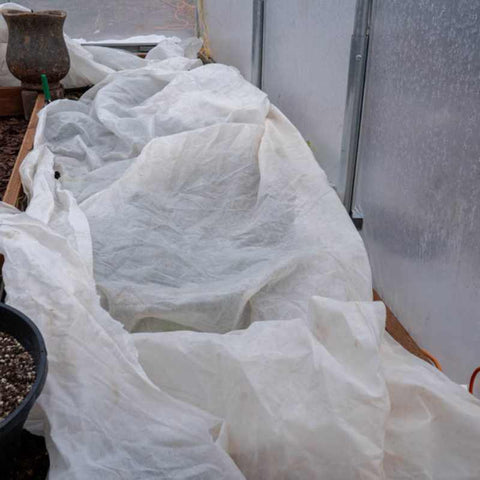
FROST BLANKETS
Frost blankets are a great way to trap heat at night if you have crops in the greenhouse during colder months and extend your season on both ends. During the coldest months, they can be left on all day and still provide 40% light transmission and add up to 15° of additional heat underneath, depending on humidity levels in the greenhouse and the weight of the blanket.
Use 4.0 oz. blankets to prepare for a frost and layer them over lighter-weight blankets if needed. Use 1.5 and 2.5 oz. blankets to provide additional heat to plants underneath during cooler months. All blankets dry quickly and will not allow condensation to form on plants. Water will pass through. Blankets should last for three years or more with proper care and storage.
HAF FANS
HAF fans aren’t just great for circulating air to keep a greenhouse cool and keep foliage dry; they also circulate warm air in cooler months. Remember, having these fans on also dries out the air and reduces humidity, which is crucial in cooler months.
DOWNLOAD A RELIABLE WEATHER TRACKING APP…OR TWO
Monitoring, understanding, and predicting inclement weather is crucial to managing greenhouse temperatures, and a reliable weather-tracking app will help you do that. My personal favorite free weather tracking apps are Weather Underground and NOAA. Dark Sky and RadarScope are excellent paid options.
FUNDING AVAILABLE FOR GREENHOUSE UPGRADES
Adding automation to your greenhouse requires up-front funding, but your savings will become obvious in the long run and create a healthier greenhouse environment. The key factor to consider is how much money you estimate the crops growing inside will make you being sold at the farmers’ market and if it’s worth the cost of insulating and heating the building to get those crops to grow.
The cost of everything depends on the quality of materials you use, the size of your greenhouse, and your overall business goals. Funding is available through the USDA, your local NRCS chapter, and farming grants in your area.
NATURAL RESOURCE CONSERVATION SERVICE (NRCS)
The NRCS offers free land and technical advice for landowners, farmers, ranchers, and homesteaders with building a pollinator habitat, removing invasives, attracting native birds, building ponds, reducing erosion, design assistance, and general conservation planning.
They offer payments through the Environmental Quality Incentives Program (EQIP), broken up into high tunnel, organic, air quality, landscape conservation, and on-farm energy initiatives. Some state programs pay up to $75 a linear foot toward greenhouse natural ventilation systems. Check out their website for details on how to get started and plan a one-on-one with a knowledgeable professional who can determine your eligibility. These programs are particularly interested in helping farmers who want to add multiple improvements to their land, so make a list of everything you’d like to do and share it with your local agent.
LOCAL, STATE, AND FEDERAL FUNDING
Seek out your local conservation district, energy efficient grants, USDA grants, agricultural enhancement programs, and renewable energy incentives to see what else may be available in your area.
FREQUENTLY ASKED QUESTIONS
How will I know if the greenhouse automation is worth the investment?
Keep track of the time you have left over to complete other important tasks on the farm instead of manually rolling up side walls, opening vents, and adjusting fan levels. Time is money! Also, carefully monitor and track the health of your plants.
How much will all of this cost?
By reviewing your electric bill and how many kilowatts it takes each item to run per hour, you can estimate how much each implement costs a year. This will help determine if you need to run them less or make efficiency upgrades.
This important data can be used in climate resiliency grant applications!
How can I keep frost from creeping into my greenhouse from outside?
Install a French drain around the perimeter by digging down two feet, laying geotextile fabric, corrugated drainage pipes, and back-filling with ¾-inch stone. Extend the drainage pipe far enough away from the greenhouse. Water that would have gone into your greenhouse will instead flow through the stone into the drainage pipe, and away from your precious crops. French drains will also reduce erosion around the greenhouse perimeter as they help direct water away from the greenhouse.
CONCLUSION
Keep your greenhouse airtight and complete annual maintenance to keep it in great working order to prolong the life of all the components. This includes replacing greenhouse plastic as needed and fixing things that may seem minor, like loose screws, broken vents, and small tears in the plastic. Have a repair kit handy that includes extra spring wire and repair tape.
Keep a basic checklist of items you can check on monthly or bi-monthly so it doesn’t become burdensome all at once. Get in the habit of checking in after big storms, before your season, and before closing up shop for the year. This will allow you time to order new parts and make any necessary repairs. Completing all these items will help you regulate greenhouse humidity and temperature.
By Jenna Rich of Partners’ Gardens
References:
https://www7.nau.edu/itep/main/eeop/docs/airqlty/AkIAQ_AirMovementAirFlow.pdf
https://attra.ncat.org/publication/organic-greenhouse-vegetable-production/
https://ag.umass.edu/greenhouse-floriculture/fact-sheets/reducing-humidity-in-greenhouse
https://www.greenhousemag.com/article/lower-electricity-use-via-natural-ventilation/
Subscribe
Sign up to get the latest on sales, new releases and more …

