How to Bottom Water Your Plants (Without Overdoing It) Step-by-Step

Have you mistakenly overwatered houseplants, flowers, or annual vegetable seedlings in the past? The bottom watering method helps to ensure your plants receive the necessary water without overdoing it. Instead of drenching plants from above, getting their leaves wet, and letting water pool, bottom watering allows plants to drink what they need from the bottom and nothing else.
If you have heavy-duty 1020 trays at home, you’re set to try this method. Besides the plant health benefits, this method offers small-scale farmers and busy gardeners both time and water conservation.

What is Bottom Watering?
Bottom watering is a technique used by houseplant aficionados, backyard gardeners, and market gardeners to water their plants from the bottom up by placing them into a 1020 tray without holes or a bathtub and then allowing them to sit until they’ve absorbed the water they need.
This watering technique encourages a more robust, downward-facing root system by forcing roots to work for their water. Placing the water at the root level and keeping water away from the soil surface reduces the risk of pests, soil crusting, and fungal disease.
Bottom watering itself is a simple process, but produces great results and is even backed by Science™.
Step-By-Step Bottom Watering Process
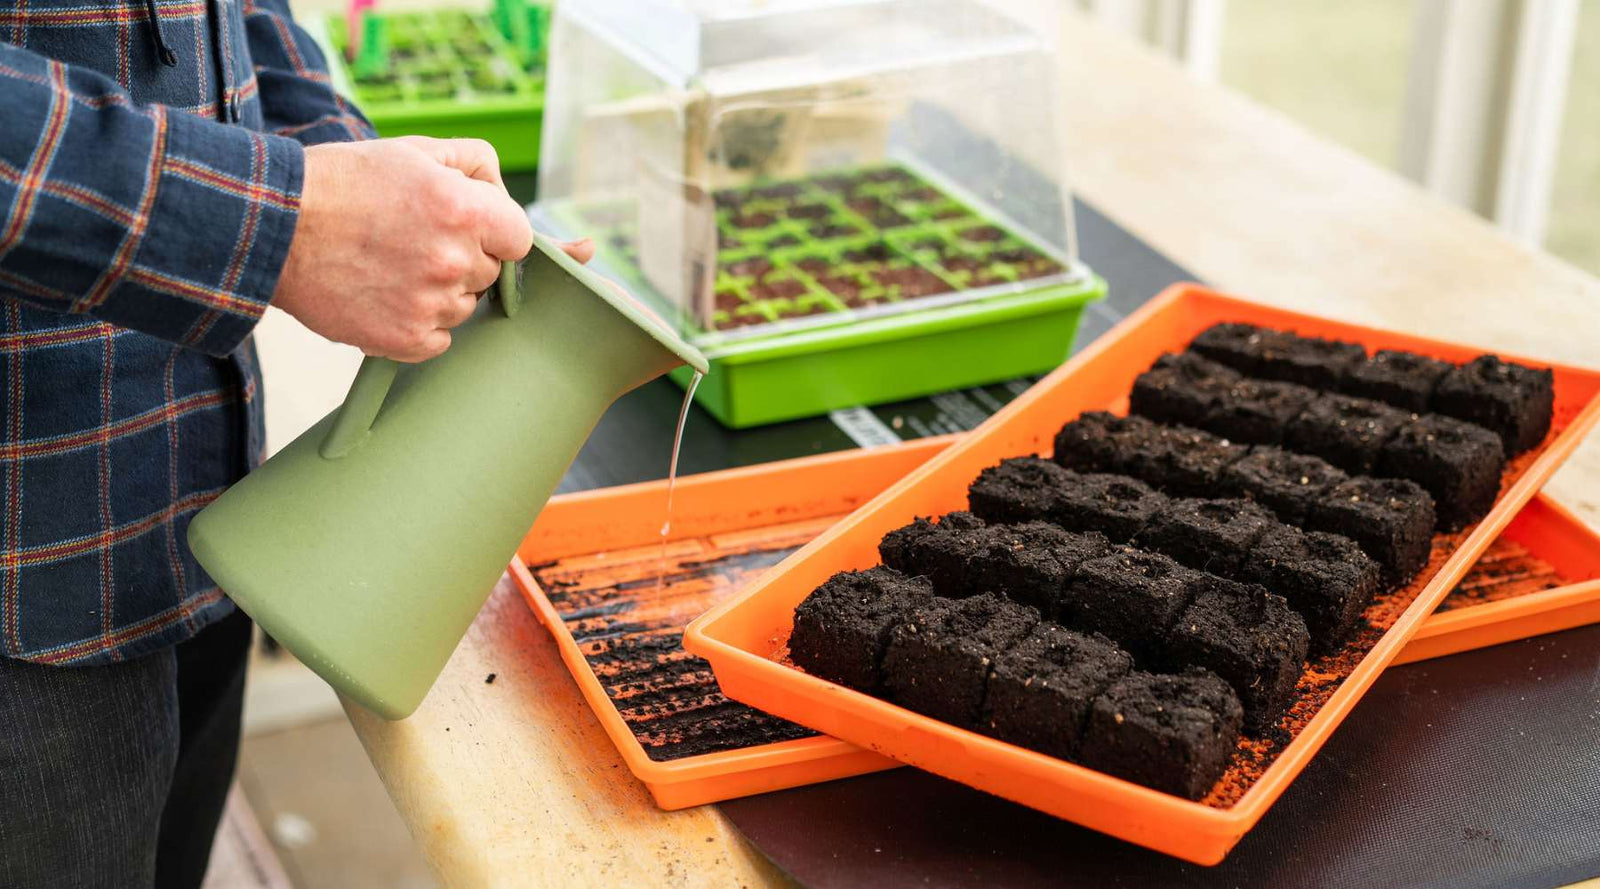
- Fill a tray or saucer without holes with ½ - ¾ inches of water.
- Place the cell tray or pots inside
- Let them sit for five to ten minutes (up to several hours), checking on their progress occasionally.
- If the water disappears immediately, add more water.
- Write in a notebook your observations of various crops’ water needs as they grow in your environment.
If your house is covered in houseplants, consider using your bathtub as the bottom tray for your pots and containers. After draining the tub, leave them there to drip dry safely without causing a mess.

Why Bottom Watering Works
While top watering forces water upon the soil, bottom watering allows plants to uptake the water they need and evenly distribute it to their roots.
This method is preferred by plants with sensitive leaves, like African violets, deep-rooted annuals like tomatoes, and houseplants with dense root balls like philodendrons and pothos.
Spider plants also prefer bottom watering, especially if the soil is bone dry. Learn more about houseplants in 10 Must-have Indoor House Plants for Gardeners and Plant Lovers.
Capillary Action
Water molecules are attracted to other water molecules. The first drop takes the path of least resistance, and others follow behind. Capillary action depends on this attraction of the water molecules to one another or cohesion.
Adhesion is the attraction of particles of different substances. In the case of bottom watering, these substances are water, soil particles, and root systems. Water travels upwards against gravity until saturation when it can’t hold any more water.
Bottom watering creates even moisture distribution because all the soil has the same access to water via capillary action. This method prevents air pockets and ensures good root-to-soil contact.
The simple science experiment of a celery stick stuck in dyed blue and red water until the leaves show color demonstrates this in action.
Oversaturation occurs when pots are left in water for too long. The stems and roots struggle to breathe, leading to possible disease and death.

Benefits for Plant Health
Pay attention to your plants during the bottom watering process and set a timer to ensure they don’t sit in water for too long. This will help avoid water-logged plants, which leads to a lack of oxygen at the root level.
Damp but not over-watered plants have a decreased risk of fungal diseases like root rot, mold, and powdery mildew. Additionally, it helps avoid dangerously high salt levels and poor drainage.
Since densely-seeded microgreens are at a higher risk of mold and mildew, read about watering them differently at different growth stages in our article, How to Water Microgreens | Which Method is Best?
Did you know that soil can become hydrophobic if it remains too dry for an extended period? Hydrophobic soil forms a protective wax coating on the soil particles that repels water, making it nearly impossible for water to penetrate.
To test soil for this condition, sprinkle water on the surface and watch for runoff. If water does not absorb into the soil, it’s hydrophobic. Hydrophobic soil forms a crust on the surface and prevents water from being absorbed.
If this occurs, you must add a wetting agent to allow the soil to absorb water. You can purchase one at your local nursery or make your own with aloe vera or agar powder.
Incorporating compost or vermiculite into your potting mix will improve drainage and help the soil retain moisture. Doing so will prevent the soil from becoming hydrophobic in the future.
Environmental and Practical Benefits
If you’ve ever top watered using a hose or watering can, you know how wasteful it can be. Plants are covered, but so is the surrounding area and ground.
Conserve water by providing a small amount to the bottom tray, then add more only if the water level decreases and the soil is still dry. Your workspace will stay cleaner, and you’ll have fewer water spills to clean up.
This practical method saves time by allowing you to move on to a different task while your plants drink. Set a timer to remind you to go back and dump out excess water.
When Bottom Watering Doesn’t Work
Bottom watering is ineffective with compacted soil, large pots, and sensitive plants. This method will not benefit pots without ample drainage holes.
If you must use a pot without drainage holes, we recommend keeping your plant in a well-draining nursery pot and placing it inside the attractive pot to allow proper watering.
Plant Types
Bottom watering isn’t the best method for every plant. These plants prefer top watering methods:
-
Shallow-rooted plants like begonias and sedums.
-
Epiphytes like ferns and orchids.
-
The juicy leaves of succulents store moisture for long periods, serving as a personal water reservoir, so they do not need frequent watering.
-
Cacti don’t allow moisture to escape easily, requiring less maintenance.
-
Seeds that have yet to germinate lack appropriately sized root systems to uptake moisture from below. Instead, mist them with a gentle sprayer and use humidity domes to maintain a consistent environment.
Bootstrap Tip
While strong-rooted tomatoes, cucumbers, pothos, and snake plants benefit significantly from bottom watering, you should occasionally top water them to flush salts and ensure evenly distributed moisture and fertilizer.

Soil Considerations
Select a well-draining seed-starting or potting mix for indoor plants, especially when bottom watering, so water can effectively travel through the pot. Compact soil that can’t drain will have difficulty absorbing water.
If the soil on the surface is not wetter after 30 minutes and the water level in the bottom tray hasn’t decreased, the soil may be too compact, already too wet, or the drainage holes may not be big enough.
Containers
Select supplies and seed trays that reflect your seed-starting and growing area’s capacity and what seeds you’re starting. For instance, tiny flower seeds perform best in 128s, whereas you should sow tomatoes and peppers in 72 cell trays and then up pot into 2.5” or 3.3” pots.
Bootstrap Farmer offers plug trays in various sizes for all your seed-starting and up-potting needs.
Our 1010 seed starting kit for backyard gardeners includes durable 6-cell plug trays and deep 1010 trays, providing a reliable setup for strong root development, healthy seedlings, and easy bottom watering.
Choose a bottom tray that you can snugly fill with containers so they don’t fall over.
Bootstrap Tip
Bottom watering containers without ample drainage holes will not yield good results, as the roots won’t be able to access the water they need, and the water can’t drain properly. Large drainage holes make this method more effective and make seedlings easy to remove.

Practical Tips for Successful Bottom Watering
These pro tips and common mistakes to avoid will help you succeed in bottom watering on your first try.
Choosing the Right Conditions
With plants outdoors, it’s best to water in the morning so they have plenty of time to absorb then drain water and allow foliage to dry. Evening watering may encourage disease, pests, and stress.
Watering once daily should suffice unless you’re experiencing extreme heat, drought, or your plants live in a greenhouse.
Consider covering plants with a shade cloth to avoid stress and prevent them from drying out between waterings, and read our article, How to Keep Outdoor Plants Alive During a Drought, for more info.
With indoor plants and seedlings you will likely need to water less frequently. Put your finger or a clean pencil an inch or so down into a container to test for soil dryness. If no soil is present when you pull it up, it’s time to water.
Avoid watering plants unless they need it to promote peak health.
Testing and Adjusting Soil
The soil in trays and pots should uptake water, then drain any unnecessary extra. If you notice your plants aren’t absorbing water, or if nothing is draining out when you move them back to the storage tray, your soil may not be draining properly.
Add coco coir, vermiculite, or perlite to improve your potting mix’s quality, texture, and aeration. Consider the premier Pro-Mix® HP mycorrhizae mix, which features high porosity and excellent drainage.
It can be used alone for seed starting or mixed with potting soil for larger plants.

Common Mistakes to Avoid
| Common Mistake | Why It's Harmful | How to Fix It |
|---|---|---|
| Leaving plants in water too long | Young seedlings' tiny roots become waterlogged and can't breathe, causing them to perish | Allow them to drip dry and provide gentle airflow to help dry out the soil |
| Neglecting occasional top watering | Salt accumulates at the top and soil forms a crust, limiting nutrient distribution and soil aeration | Top water occasionally to distribute nutrients, flush salts, and aerate the top soil layer |
| Not adapting to seasonal changes | Plants need different water levels as sunlight, temperature, and day length change throughout seasons | Pay close attention to your plants and adjust watering frequency and amount to match their changing needs |
Bootstrap Tip
Use pest control sticky trap cards to trap fungus gnats, aphids, white flies, and spider mites. Gnats are particularly attracted to wet organic material, so while you can’t remove that from the equation, you can keep the top layer of soil from becoming saturated.

FAQs About Bottom Watering
How often should I bottom water my plants?
While you should keep a loose schedule in your mind or on a calendar, the best watering frequency is when your plants need it, and while that might sound vague, you will learn quickly what your plants need.
Can bottom watering lead to root rot?
Root rot can occur if plants sit in water too long, or if containers aren’t well-draining. If you focus on proper watering frequency, use high-quality supplies and a porous soil mix, your plants should remain disease-free.
How much water should I add to the bottom tray?
Start with a cup of water for shallow 1020s and two cups for deep 1020 trays. Set your cell trays or pots inside and monitor how quickly they uptake the water. You can always add more, but too much can be harmful and keep the roots from breathing.
Is bottom watering better than top watering?
For most plants bottom watering allows plants to absorb what they need, encourages robust root development, prevents wet foliage and soggy soil, and prevents salt build-up.
Do all plants benefit from bottom watering?
You can bottom water all plants, but some will benefit more. Provide bottom watering for plants with delicate tops, like African violets and succulents, and those prone to root rot or damping off, like Swiss chard.
How can I tell if my soil is absorbing water properly?
Water should begin to soak up into the pots within a few minutes. Stand by and watch the water level, which should be decreasing. If the surface looks damp, it’s time to remove the plants as the water has traveled up through the pot.
If the water in the bottom tray doesn’t seem to be decreasing, the plants may not require watering, or your soil may be compacted.
Can I mix fertilizer into the bottom watering trays?
Yes, mixing water-soluble fertilizer into the bottom tray is a quick and efficient way to fertilize your plants. Follow the instructions on the bottle so you don’t provide too much and burn the plants.
How long should I leave my plants in the water?
The length of time you leave plants in bottom watering trays depends on their growth stage, type of plant, and the soil’s drainability. Remove the plants when the water level decreases from the bottom tray and the soil surface appears damp.
Plants may take only ten minutes to absorb the water, but it's possible to leave them in water for several hours. Use intuition and observation data to determine if they’ve had enough.
The danger of too much water is real, which is why hydroponic systems include an aeration component such as air stones or a blower. Read about it in Hydroponics 101: A Beginner’s Guide to Efficient and High-Yield Plant Growth.
Also in How to Grow Seedlings

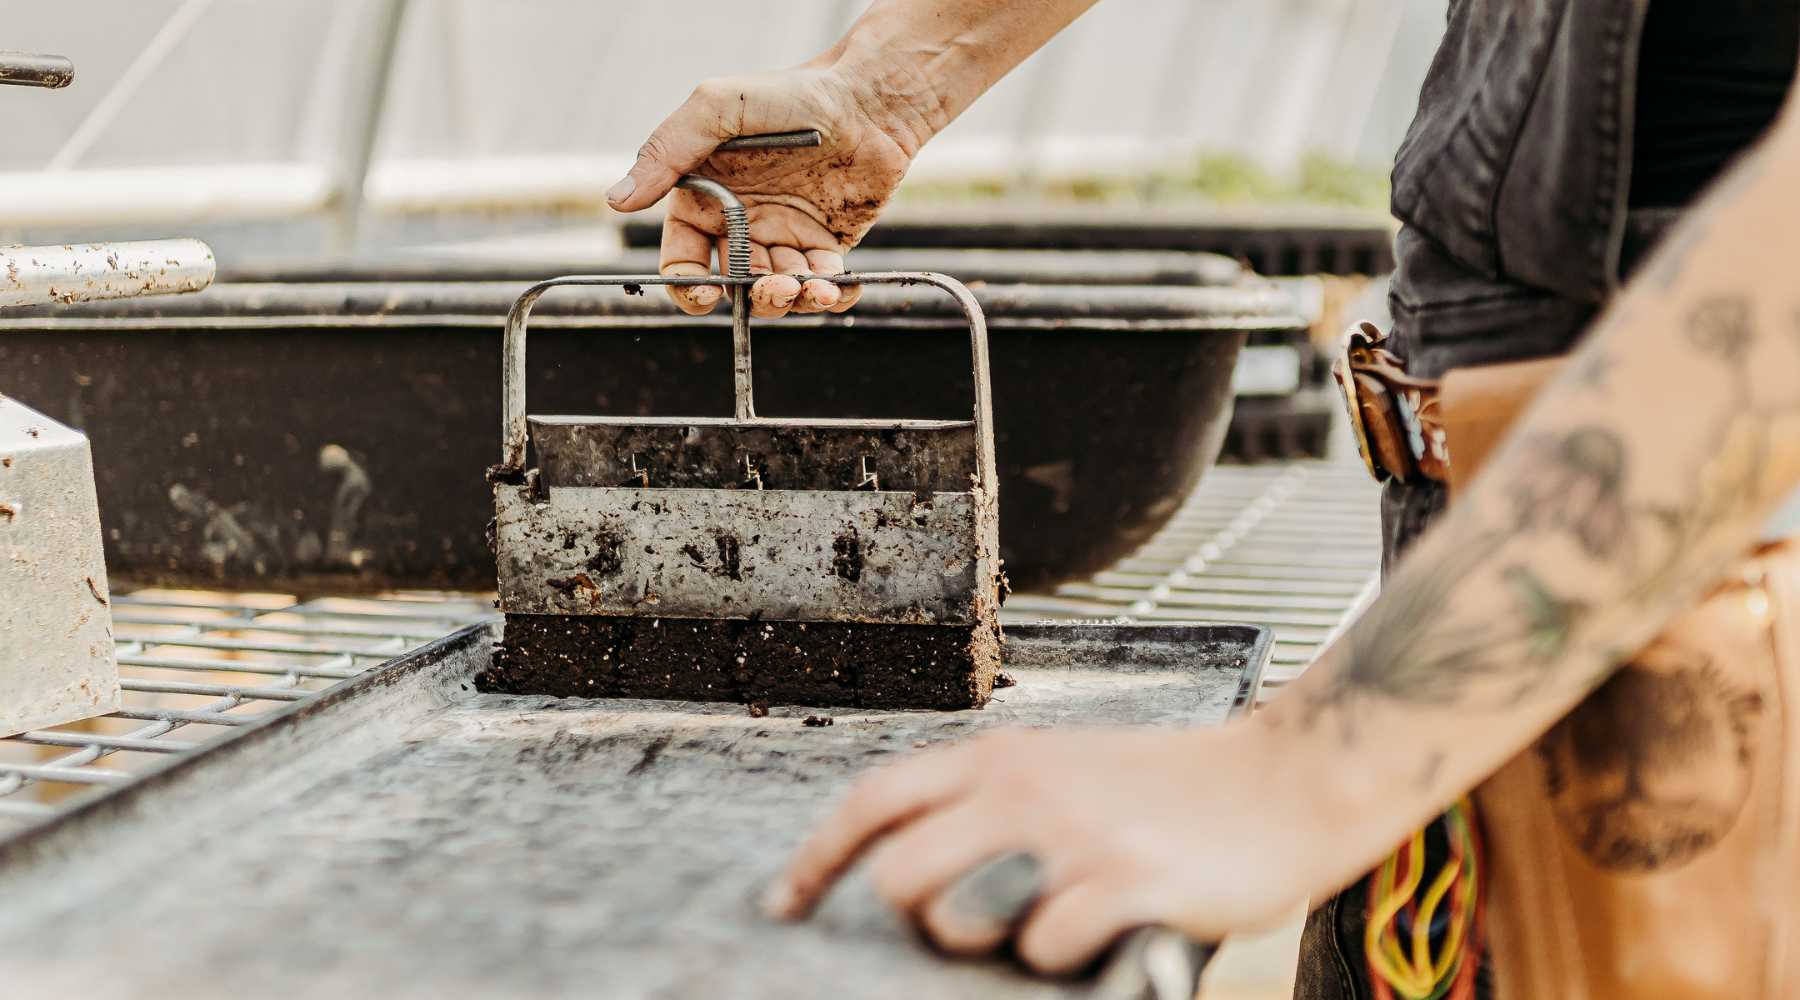
Soil Blocking 101
Soil blocking is a method of propagating seedlings that involves filling a metal blocking tool with soil and squeezing to form a compressed cube. Seeds are planted directly into the formed block. Soil blocks come in various sizes and are advantageous for air pruning roots.

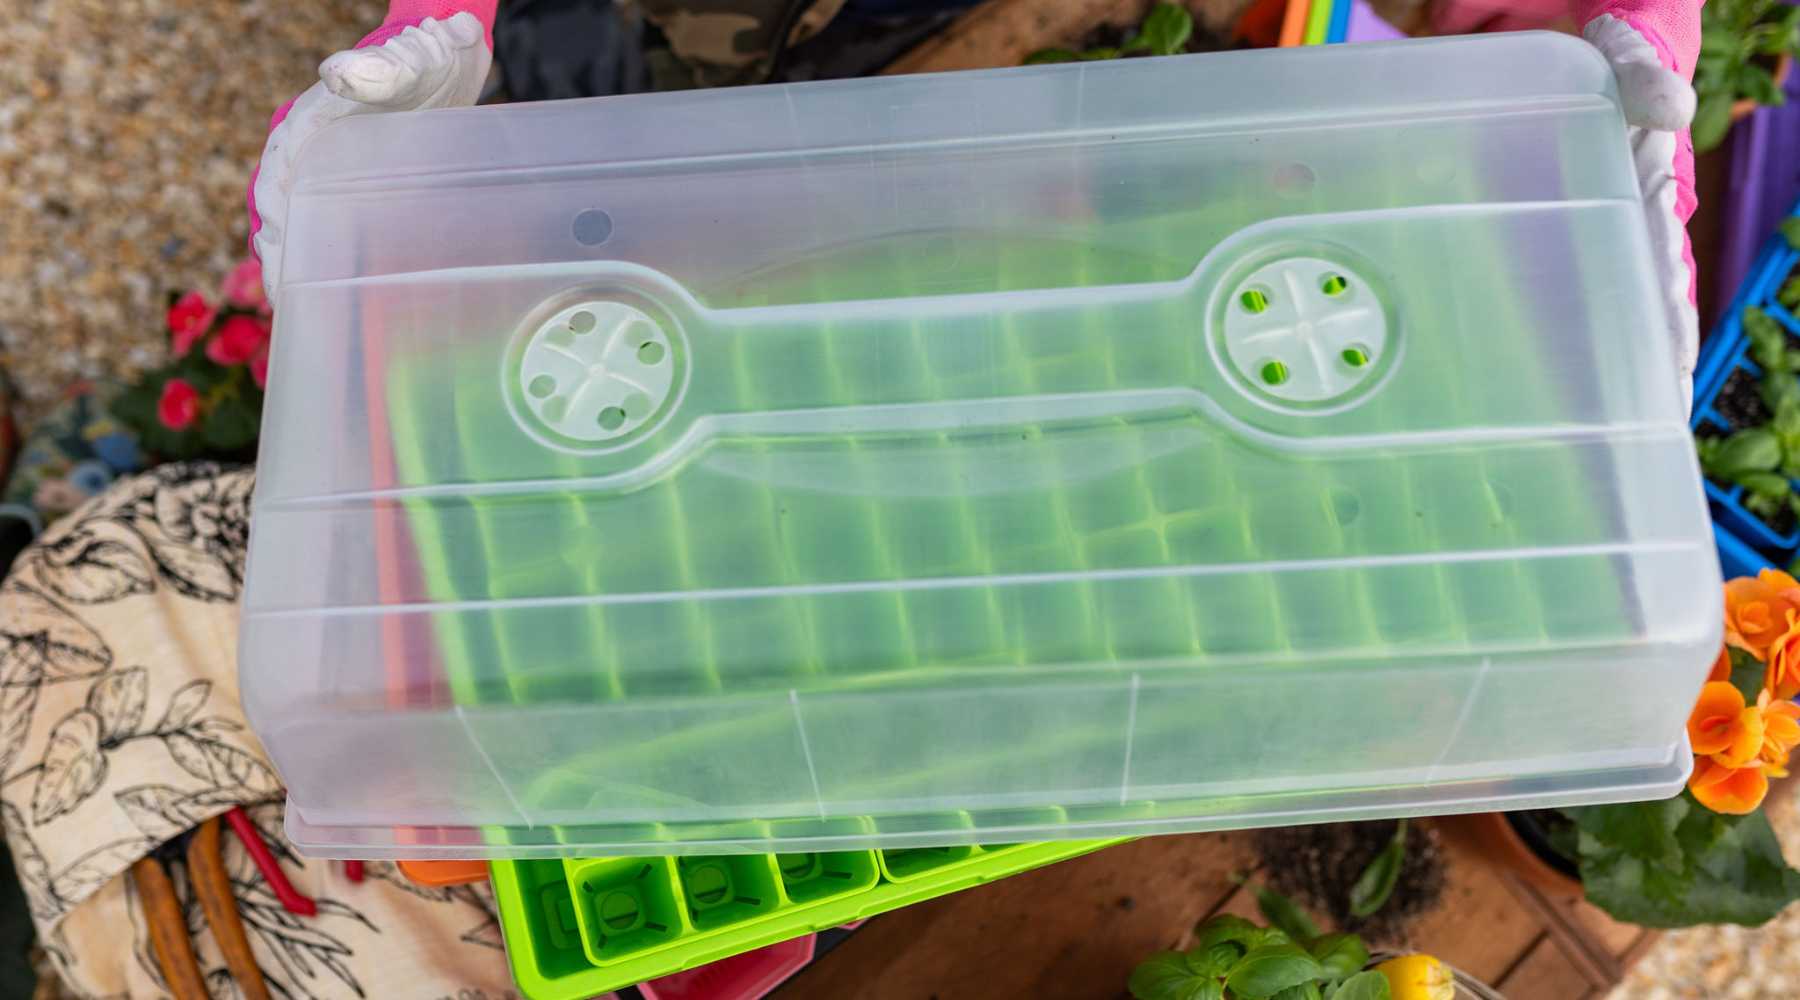
How to Use a Humidity Dome for Seed Starting
Starting up seeds for this year's garden? Here is the lowdown on the humidity dome debate when starting seeds in cell trays or starting a tray of microgreens. Humidity domes are a useful tool to use during germination, often used in conjunction with heat mats.
Read More
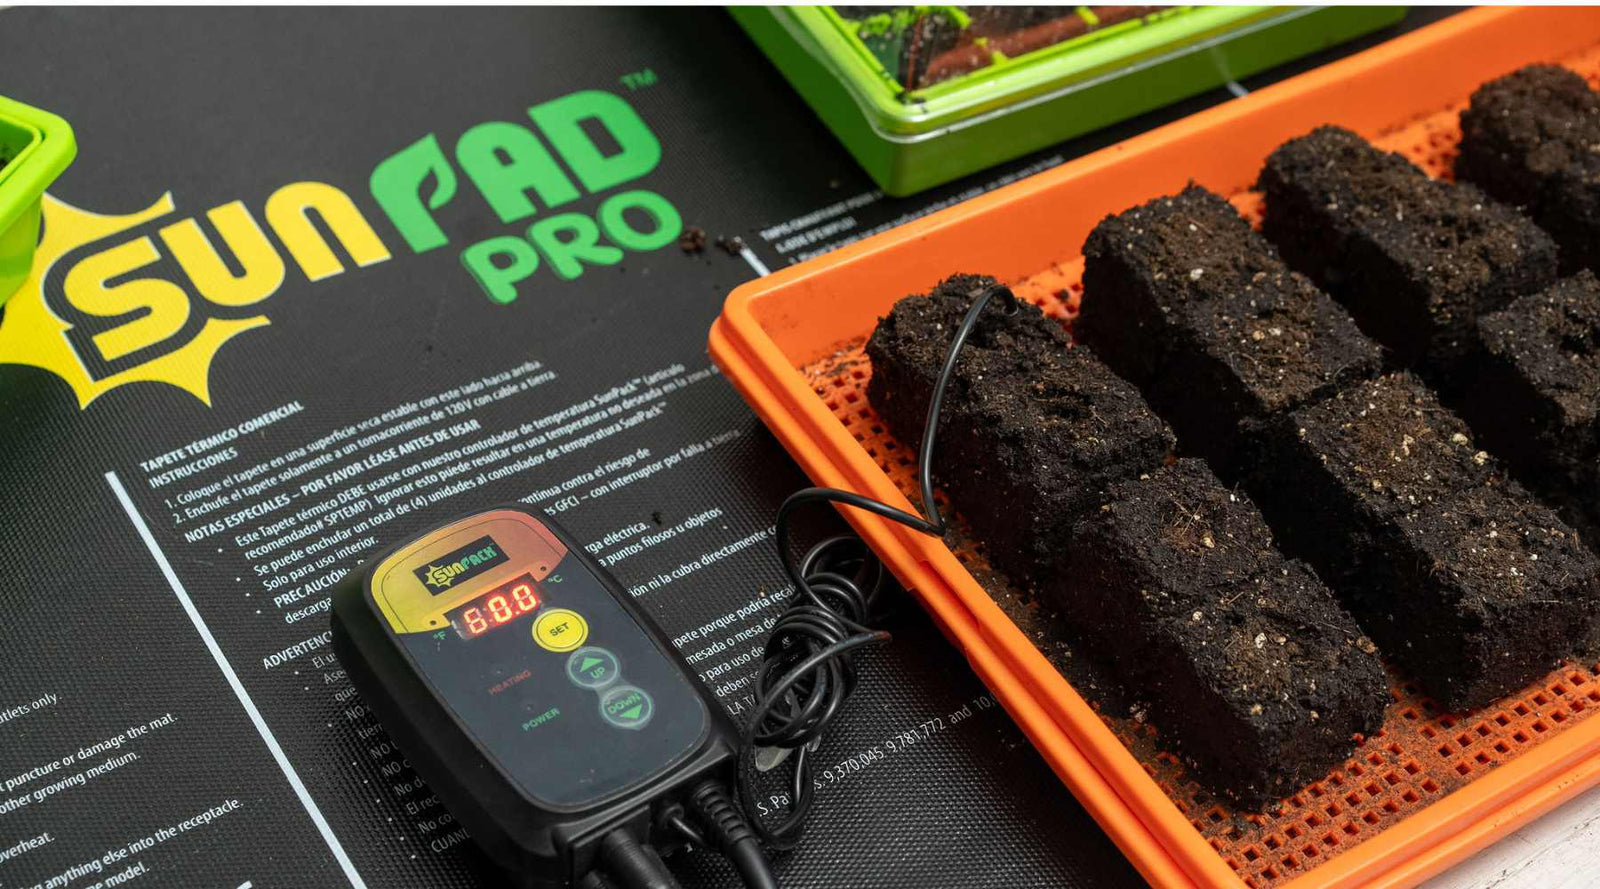

How to Use Heat Mats for Starting Seeds
Learn how to set-up and properly use a heat-mat in this quick how-to article. Read about the best way to use a heat mat and find out if you even need one!
Read More