How to Transplant and Up Pot Seedlings

How up-potting can boost your garden's growth
Up-potting, sometimes called “potting up,” is the simple act of moving your seedlings into a slightly larger container. But don’t let its simplicity fool you. This one step can significantly impact your garden's health and productivity.
Whether you’re growing vegetables, herbs, or flowers, knowing when to up-pot and how to do it properly helps your plants develop stronger roots, avoid stress, and reach their full potential. In this guide, we’ll walk you through the why, when, and how of up-potting and help you choose the right tools to support every stage of your seedling’s growth.
Understanding Up-Potting: The What and Why
Every plant starts small, but not every plant thrives in the same container from seed to transplant. As seedlings grow, their roots need more room, and their access to nutrients changes. Up-potting is how gardeners respond to that growth.
When done at the right time, up-potting helps prevent root-bound plants, encourages steady development, and avoids the pitfalls of inconsistent watering. It also allows you to keep your seedlings growing indoors longer, giving them a better head start when it’s time to move them outdoors or into the greenhouse.
You'll notice benefits like:
-
More balanced growth above and below the soil
-
Stronger, more transplant-ready root systems
-
Better moisture and nutrient availability in fresh soil
This simple step of up-potting can be the difference between a stunted seedling and one that’s ready to take off when transplanted outdoors.

Signs Your Seedlings Are Ready to Move
How do you know when it’s time to repot? Look for these signs:
- Roots starting to poke out of the bottom of your trays or circling on the soil’s surface
- Soil is drying out faster
- Stunted or slow growth
- Plants appearing top-heavy and unstable
- Wilting even after watering. This indicates rootboundness or the need for more space.
Rather than relying on a checklist, observe how your plants behave. A healthy root system should hold the soil together when you gently lift the plant from the tray. If the plug falls apart or the roots form a tight spiral, it’s time to pot up.

When to Up-Pot vs. Transplant
You should know in advance which seedlings you'll up-pot and which will be transplanted directly from their first pot. Sudden weather changes and life events may affect this.
Buy yourself time with air-pruning trays. Seedlings in air-pruning trays and pots stay healthier longer, and the roots are less likely to become tangled. But if you’re using standard cell trays or small nursery pots, expect to up-pot anything fast-growing, especially if it will be staying inside longer than 3–4 weeks.
Up-pot these seedlings
Vegetables like tomatoes and peppers, and heat-loving herbs like basil, need more time to grow indoors before moving outdoors when ideal conditions are met. Move these from 50-cell or 72-cell trays into 2.5" or 3.3" heavy-duty pots. The choice you make depends on your zone, indoor setup, and transplant date.
Transplant these
Vegetables like squash and cucumbers mature quickly and don't require up-potting. For this reason, it's crucial that you get the sowing time just right so they aren't stuck waiting on weather or bed preparation.
Plants growing in air-prune trays can often wait a little longer because their root systems stay healthier and less tangled.

Up-Pot Timeline (By Plant Type)
Timing your up-potting depends on how quickly a plant grows, how long it stays indoors, and how much root space it needs to thrive. Here’s a breakdown of common plant types and when you might expect to move them into larger containers:
Fast-Growing Vegetable Plants
Vigorous growers such as tomatoes, peppers, and eggplants often outgrow their starter trays in just a few weeks. Up-pot them every 2–3 weeks. Lettuce and herbs may need a bit longer to mature. Up-pot them as needed.
Cucurbits such as squash, zucchini, and cucumbers mature quickly and are often ready for transplanting in 2-3 weeks. Bootstrap tip: If they require more time, gently up-pot them, ensuring you don't disturb their roots too much.
Start beans, corn, beets, and spinach in smaller containers, then move them up once they’ve developed their first few sets of leaves. Add more than one seed per cell to account for low germination rates.
Members of the cabbage family, including broccoli, cauliflower, and Brussels sprouts, perform better when planted deeper in their new pots during the up-potting process, which encourages stronger stems and better structure.
Slow-Growing Plants
Succulents, bonsai, and other slower growers may not need to be moved more than once a year, or even every other year. They can tolerate tight quarters longer and usually signal their readiness by slowing growth or by potting mix breakdown, rather than by visible root pressure.
Indoor Plants
Houseplants typically need to be up-potted every 12–18 months, depending on their container size and growth rate. A good clue? You’re watering more frequently than usual or seeing roots emerge from the bottom of the pot.
Perennials
Container-grown perennials can become root-bound over time. Most benefit from fresh soil and more space every 2–3 years, which helps rejuvenate growth and supports long-term health.
Trees and Shrubs
Smaller trees and shrubs typically require larger pots each year as they continue to grow. Once they reach your desired size, they can often remain in the same container with occasional topdressing rather than being up-potted.
Orchids
While orchids prefer to be snug, they’ll need repotting every 1–2 years, mainly when the potting medium starts to break down. Even if roots are still contained, decomposed bark or moss can affect drainage and airflow.
As always, observe your specific plants closely. They’ll usually let you know when it’s time to make a move.
When to transplant seedlings outside
Transplanting tender seedlings outdoors is a regionally specific farm or garden task. However, growers in zones 8-11 may be able to transplant seasonally appropriate plants year-round.
In colder growing zones, wait until nighttime temperatures reliably remain above 50℉ (10°C). If growing in a hoop house or cold frame, advance your planting by several weeks.
The best time to transplant any plant seedlings, whether purchased from a local nursery or started from seed in seed-starting trays, is once they have reached the appropriate growth stage and the outdoor conditions are suitable.

AT WHAT STAGE OF GROWTH DO YOU TRANSPLANT SEEDLINGS?
A common rule of thumb is to wait until your seedlings have developed their second set of true leaves before transplanting. But that’s just part of the picture.
What really matters is whether the seedling has built a strong enough root system to hold its shape when removed from the tray. If you transplant too early, the root ball may fall apart, damaging those delicate new roots and setting the plant back.
To check, gently grasp a seedling at the soil line and pull it from the tray:
-
If the entire plug slides out intact, the roots are ready.
-
If the plug falls apart, the plant needs more time.
-
If the plug comes out easily but shows dense, circling roots, it may already be root-bound and should be potted up or planted immediately.
Seedlings grown in trays like our cell trays need just the right balance: enough time to establish, but not so long that they start to outgrow the space.
How to avoid rootbound seedlings
When seedlings stay in small containers too long, they can become rootbound. Their roots begin to circle the inside of the cell, eventually forming a dense, tangled mass. This can limit your plant’s ability to take up water and nutrients, even after transplanting.
One of the best ways to avoid root-bound seedlings is to start them in air-prune trays. Our 4-cell, 6-cell, and 72-cell air-prune trays feature side slits that expose roots to air, naturally pruning them and preventing circling.
If you’re not sure when you’ll be able to transplant, these trays give you more flexibility and keep your root systems healthier for longer.
How to get seedlings with optimal root growth for transplanting
The three best ways to achieve a healthy root system when growing your own plants from seed are:
- Use a bottom watering system to prevent soil compaction.
- Plant in properly sized trays that encourage downward root growth.
- Up-pot your seedlings before they become root-bound if there's a delay in transplanting.
For more information on growing your own plants from seed, check out our Seed Starting 101 Guide in the Seed Starting Resource Blog.
Up-Potting Tips and Procedure
Here are some practical tips and best practices.
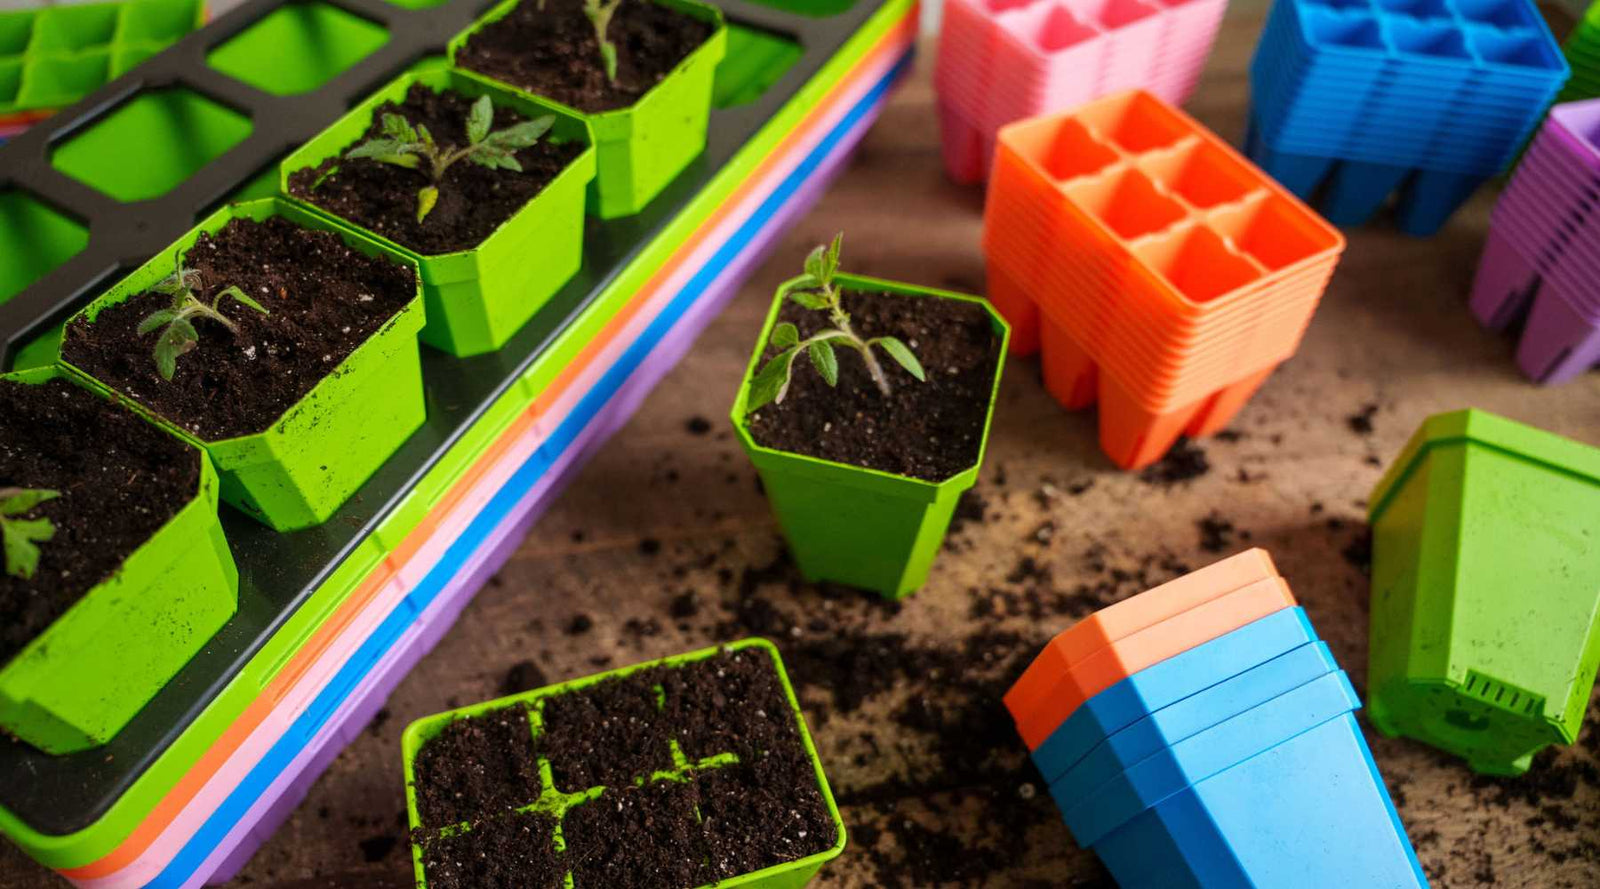
Choosing the right pot size: The new pot should be just one size larger than the plant's current pot. Going too large can lead to overwatering, as the excess soil retains more water than the roots can absorb. Typically, choose a new pot that is 1-2 inches larger in diameter for small plants and 2-4 inches larger for bigger ones.
Selecting the right soil: The type of soil you use plays a significant role in your plant's health. Opt for a high-quality potting mix that suits your specific plant's needs. For most plants, general-purpose potting soil works well. However, some plants, such as succulents and cacti, require well-drained soil, while others, such as ferns, prefer a more moisture-retaining mix.
Bootstrap tip: Always check the seed packet and seed provider’s website for additional crop and variety-specific information to help every aspect of your plant’s growth cycle.
Up-Potting Steps:
- Water heavily 12-24 hours before transplanting to help keep the soil intact while pulling out of the cells.
-
Water the plant lightly a few hours before up-potting to reduce root stress.
- Remove the plant from its current pot, carefully avoiding root damage. If the plant is stuck, press the sides and bottom of the pot to free it, or use a popsicle stick or a Widger Dibbler Set to help pry the plants out.
- Examine the root ball. If you notice any dead or rotting roots, remove them.
- Prepare the new pot by adding potting mix, then place the plant inside. The plant should sit at the same depth as in the previous pot. Fill around the plant with more soil, pressing gently to remove air pockets.
Aftercare for transplanted plants:
-
Water thoroughly to help the soil settle around the roots.
-
Provide rest in a quiet, shaded area for a few days to help it recover from the shock of being moved.
-
Monitor the plant for a few days for signs of stress. Some wilting or leaf drop is normal, but prolonged symptoms could indicate a problem.
- Once the plant has settled into its new pot, resume your normal care routine.

Choosing the best seedlings at the nursery
Follow these tips when shopping for seedlings at nurseries:
- Contrary to popular belief, you don't want the overgrown plants with flowers and fruit. If a plant begins to flower before it's in the ground, it has received the signal that it's nearing the end and it needs to reproduce.
- Avoid leggy plants with tall, thin stems. These have likely not been receiving direct sunlight and may topple when planted outdoors.
- Choose smaller, compact seedlings. They'll perform best when you plant them.
- Check the foliage for discoloration and damage. Leaves should be uniformly green (unless it is a plant with variegated foliage).
- Check the underside of leaves for aphids and insect eggs.
- Look for signs of disease, including yellowing leaves, brown spots, and dried tips.
- The bottom drainage holes should be free of thick, protruding roots. This is a sign of possible rootboundness. Some small ones are fine.
- Look for moss or signs of fuzzy mold on the soil surface. These are likely signs that the seedlings are old stock or of overwatering, both of which can cause weak transplants.
- Squeeze the sides of the pot. It should give slightly under pressure, indicating there is still some loose potting soil, which means the roots have some space to grow.
- The potting mix should be damp but not sopping wet. Root-bound seedlings often become hydrophobic and fail to absorb water effectively.

Transplanting Seedlings Outdoors
Prepare your beds or pots by amending the soil and shaping the area. Start the hardening off process 1-2 weeks before transplant day. This gradual introduction to outdoor conditions helps reduce transplant shock. Don't skip this step. Your plants will be healthier and more productive when given a great start.
Ideally, conditions are mild on transplant day, and you can start in the morning before the sun peaks. To remove seedlings from cell trays or pots:
- If your seedlings are in small pots, lightly slap the sides of the container to loosen the root ball. Then turn the pot upside down, support the stem base between your fingers, and give the bottom of the pot a few gentle taps until the plant releases into your hand. If the roots are circling or matted, gently tease them apart. This encourages outward growth in the new soil.
- For trays with large drainage holes, press the plug up from the bottom. If the holes are small or the roots are clinging to the sides, use a dibbler or butter knife to gently loosen the plug before lifting it out.
Make a hole just big enough for the seedling’s root ball. Set the seedling in the hole, lightly tamp down the soil around it, and water thoroughly to help the roots settle in. Bootstrap tip: If it's windy or sunny, cover the bed with a frost blanket or shade cloth for additional protection. Keep it on until the plant is established, then remove it if needed to ensure proper sunlight and airflow.

Bootstrap Farmer Up-Potting Equipment Options
The foundation
1020 and 1010 Trays: Propagation trays for hobby or commercial growers are USA-made and heavy-duty, making them easier to carry and move around.
Seed-starting options: Bootstrap Farmer offers a complete lineup of options for gardeners based on industry-standards. Bootstrap Farmer innovations are designed for farmers who make a living by feeding their communities and who need to rely on the equipment they invest in.
All options are compatible with our 1020 and 1010 foundational trays. Our system will move your seeds from germination to the field year after year.
Cell Trays
A cell tray insert is a plastic container with multiple individual compartments, each acting as a mini pot. These are typically used in seed starting and are designed to fit into Bootstrap Farmer 1020 trays. Advantages of cell trays include:
- Efficient use of space. They allow gardeners to start many seeds within a small area, which is particularly beneficial for those with limited room.
- Each seedling is grown in its own cell, reducing root disturbance during transplanting. This reduces the risk of damaging the delicate seedlings during this crucial stage.
- Prevents overcrowding, which can lead to disease and poor growth. It also makes it easier to monitor and manage each seedling's water, soil, and growth progress.
- Cell trays are reusable, providing a cost-effective solution for gardeners who regularly start seeds. Therefore, if you're considering starting seeds, a cell tray insert can be an invaluable tool to help ensure your seedlings enjoy the best possible start.
Bootstrap Farmer cell trays are available in 50-, 72-, 128-, and 200-cell capacities. Check out this article to learn more about Bootstrap Farmer cell trays and their use.
Air-Prune Trays
An air-prune tray for seed starting is a specially designed tray that promotes the development of a robust, fibrous root system in plants. The concept behind air pruning is that when a plant's root comes into contact with air at the edge of the potting medium, it naturally prunes itself and stops growing lengthwise. Instead, the plant focuses on producing new, lateral roots within the soil.
These trays often have open bottoms that expose the roots to air, promoting air-pruning. This design prevents roots from circling the inside of the pot or becoming root-bound, which is a common problem in traditional pots.
Benefits of air-pruning:
- Promote healthier root development
- Lead to stronger, more vigorous plants
- Help establish a robust root system early to set the stage for successful plant growth.
Bootstrap Farmer air-prune options
- Air Prune Propagation Tray - 72 Cell is the perfect alternative to soil blocking. Available in black, orange, green, pink, blue, and purple.
- 4-Cell Air Prune Inserts: Our 4-cell plug inserts are deeper, providing more space for growing crop varieties that need a little more room. Eight of these removable inserts fit in a Bootstrap Farmer 1020 tray. Made from food-safe, heavy-duty polypropylene plastic and built to last many seasons. Available in black, orange, green, pink, blue, and purple.
- 6-Cell Air Prune Trays: Our 6-cell tray inserts are designed for growers who want an easily removable insert when growing various crops. They are durable and built to last many years. Available in black, orange, green, pink, blue, and purple.
Bootstrap Farmer heavy-duty seed-starting pots
2.5” Pots: Our smallest pot fits into our 32-cell plug trays, making it easier to plant your favorite vegetables, herbs, or flowers. It is a gardener's favorite. Available in black, clear, orange, green, pink, blue, and purple.
3.3” Pots: designed with the serious grower in mind. Eighteen of these pots are designed to fit in a 1020-deep tray. Also available in sets with inserts. Available in black, orange, green, pink, blue, and purple.
5-inch Nursery Pots: Designed with vegetable and flower gardeners in mind, these durable 5" pots are perfect for up-potting tender seedlings and to give northern growers more time before transplanting. Also available in sets with inserts. Available in black, orange, green, pink, blue, and purple.
FAQs for How to Transplant and Up Pot Seedlings
Should I fertilize my seedlings before transplanting?
Most seedlings will grow just fine without additional feeding. In fact, excessive nutrition in the growing medium can weaken seedlings. Using a balanced potting mix that includes aged compost or worm castings will provide your plants with everything they need while they are young.
If you are using a sterile seed-starting mix like ProMix that contains only coco coir, peat moss, or perlite to germinate your seeds, they may require very light feeding once they have a second set of leaves. This applies only if you plan to continue growing them indoors for a while beyond the second set of leaves.
We generally don't provide direct advice on fertilizing, as it varies by individual and situation, but buying a well-rounded potting soil will help ensure your seedlings are adequately nourished.
If you started tomatoes, peppers, or squash in sterile seed-starting mix, up-pot them into a larger container with a balanced potting soil. This is more effective than using garden soil, which may not have a balanced nutrient profile.
HOW LONG CAN SEEDLINGS STAY IN CELL TRAYS?
The duration a seedling can remain in a cell tray depends on the size of the cells. Deeper and larger cells both allow for extended growth as the plant has more room. Otherwise, seedlings can become root-bound if not given adequate space for their roots.
Typically, after sowing the seeds, the cell trays are used for 3-4 weeks before transplanting to an outdoor plot or into a larger container. If transplanting tender seedlings outdoors, consider using a frost blanket to protect them from late spring frosts. Learn more in Frost Blanket: How to Use it and When.
One thing to keep in mind with transplants is to choose your sizing according to how long the transplant must stay indoors before getting transplanted into the garden. This will factor into Selecting the Right Cell Tray for the seed types you will be growing.
HOW DO YOU TRANSPLANT SMALL SEEDLINGS?
Farmers have moved into using cell trays in order to increase the amount of transplants that can be grown in a smaller space. Many have their own tips and tricks to finessing a seedling plug out of a cell or using a plug popper. Bootstrap Farmer cell trays are specially designed for growers by growers to make this chore a bit easier. Here's a great video highlighting how to remove the plugs from the cell trays.
Why plant seedlings over direct sowing seeds in the garden?
Sowing seeds into cell trays and planting starts into the ground offer some major advantages to the grower. You’ll be able to get a head start on the growing season by starting weeks before your last frost date. Planting into cell trays also helps increase the number of seedlings that can be grown in a smaller amount of space. This is a huge advantage for growers who are growing for quantity.
Another advantage of growing out seedlings to transplant is a higher seed success rate. You only transplant strong seedlings and, therefore, are generally able to have more growing success.
Watch the Video
Also in How to Grow Seedlings

Soil Blocking 101
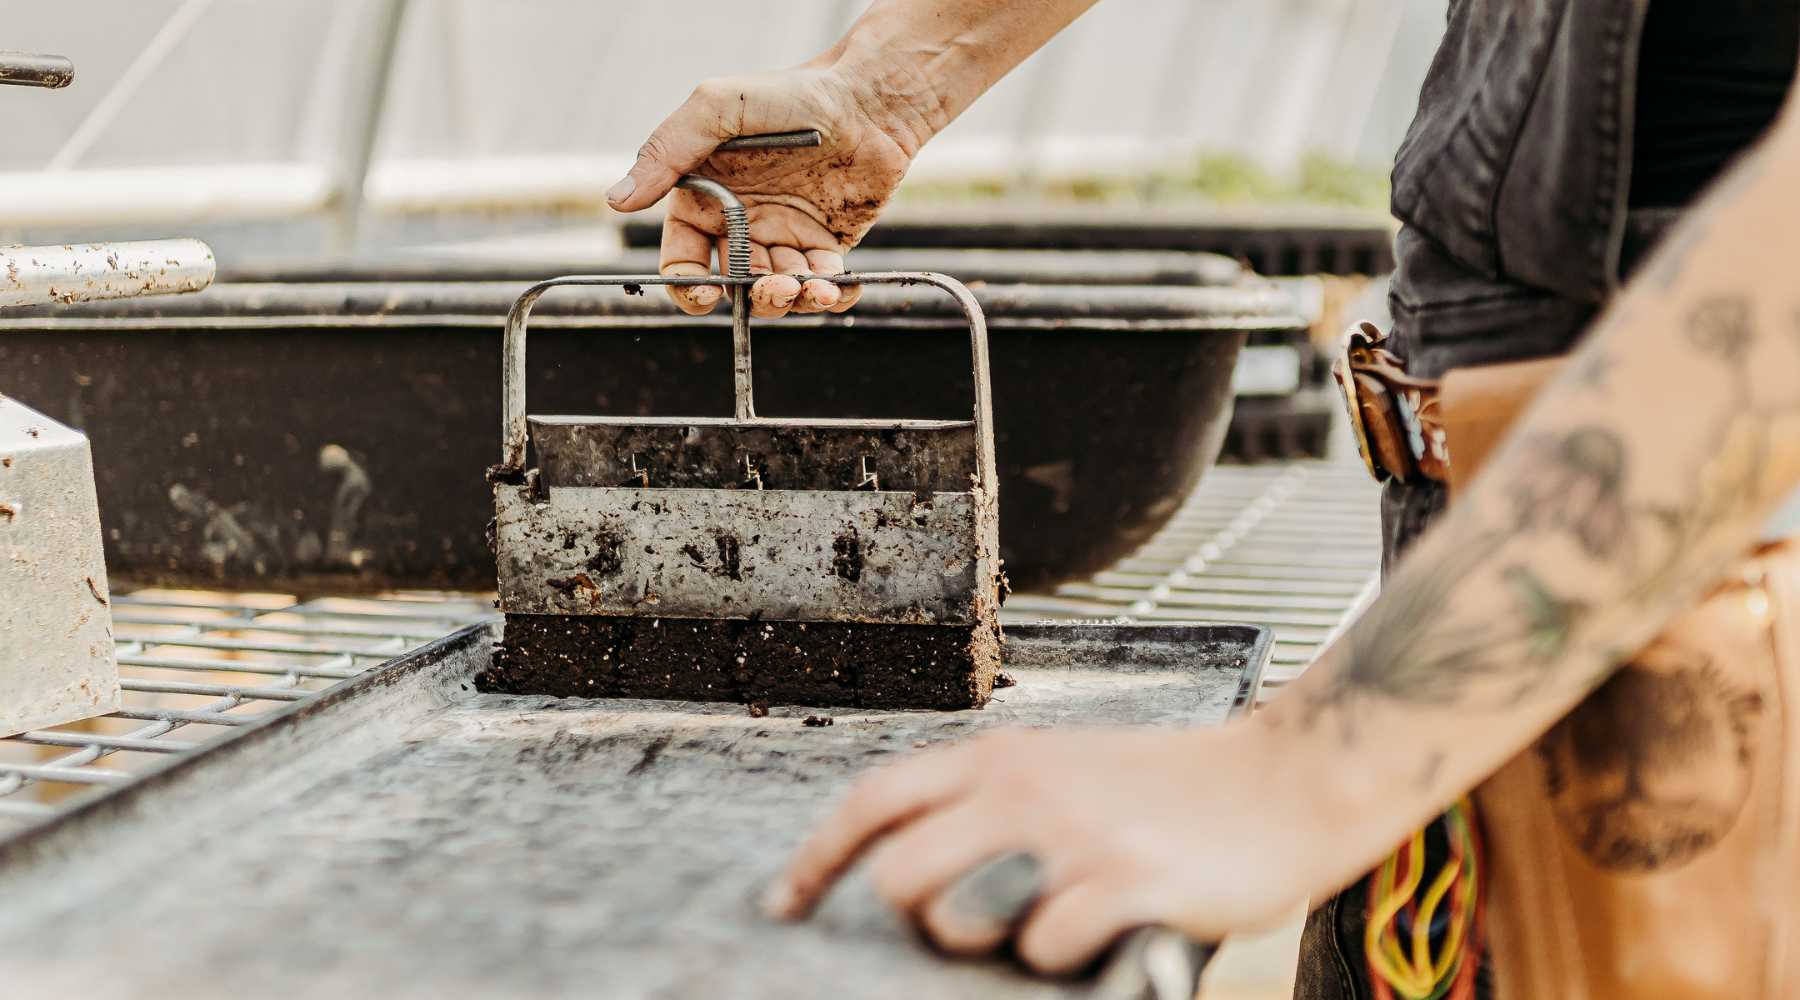
Soil blocking is a method of propagating seedlings that involves filling a metal blocking tool with soil and squeezing to form a compressed cube. Seeds are planted directly into the formed block. Soil blocks come in various sizes and are advantageous for air pruning roots.


How to Use a Humidity Dome for Seed Starting
Starting up seeds for this year's garden? Here is the lowdown on the humidity dome debate when starting seeds in cell trays or starting a tray of microgreens. Humidity domes are a useful tool to use during germination, often used in conjunction with heat mats.
Read More
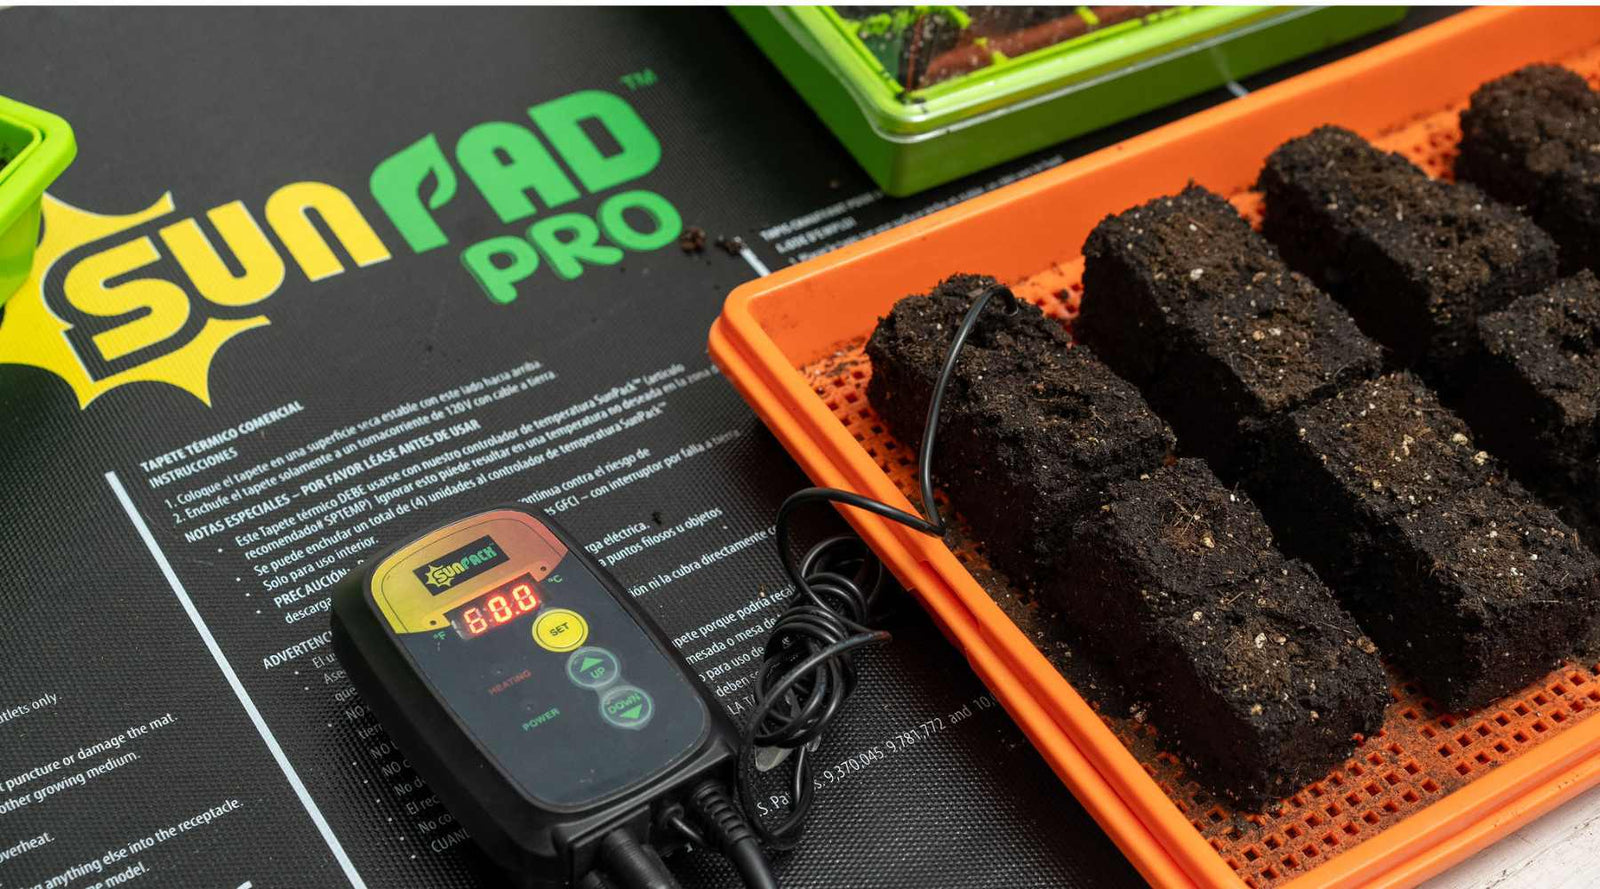

How to Use Heat Mats for Starting Seeds
Learn how to set-up and properly use a heat-mat in this quick how-to article. Read about the best way to use a heat mat and find out if you even need one!
Read More